 Hyundai Equus: Climate Seat Unit Repair procedures
Second generation VI (2009–2026) / Hyundai Equus VI 2009-2026 Service Manual / Body Electrical System / Seat Electrical / Climate Seat Unit Repair procedures
Hyundai Equus: Climate Seat Unit Repair procedures
Second generation VI (2009–2026) / Hyundai Equus VI 2009-2026 Service Manual / Body Electrical System / Seat Electrical / Climate Seat Unit Repair procedures
Second generation VI (2009–2026) / Hyundai Equus VI 2009-2026 Service Manual / Body Electrical System / Seat Electrical / Climate Seat Unit Repair procedures
| Removal |
Front Seat - Climate control system Seat Blower
| 1. |
Disconnect the negative (-) battery terminal. |
| 2. |
Remove the front seat.
(Refer to Body - "Front Seat Assembly") |
| 3. |
Remove the front seat cushion cover.
(Refer to Body - "Front Seat Cushion Cover") |
| 4. |
Remove the blower fan (A) after removing the fixed clip (B) and screws.
|

| 5. |
Remove the front seat back board.
(Refer to Body - "Front Seat Back Cover") |
| 6. |
Remove the TED (A) from the seat back and then loosen the screws.
|
| 7. |
Disconnect the TED connector and then remove the duct. |
Front Seat - Climate control system seat unit
| 1. |
Disconnect the negative (-) battery terminal. |
| 2. |
Remove the front seat.
(Refer to Body - "Front Seat Assembly") |
| 3. |
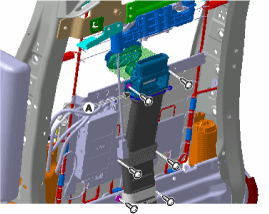
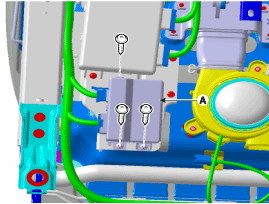
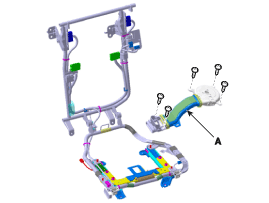
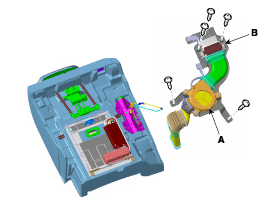
Remove the climate control system seat unit (A) after disconnecting the connectors and loosening the screws.
|
Reat Seat - Climate control system Seat Blower
| 1. |
Disconnect the negative (-) battery terminal. |
| 2. |
Remove the rear seat.
(Refer to Body - "Rear Seat Assembly") |
| 3. |
Remove the rear seat cushion.
(Refer to Body - "Rear Seat Cushion Cover") |
| 4. |
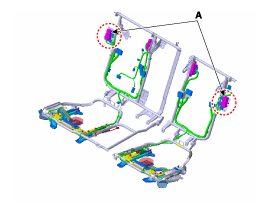
Remove the blower fan and the TED (B) after loosening the screws from the seat frame.
|
| 5. |
Remove the rear seat back cover.
(Refer to Body - "Rear Seat Back Cover") |
| 6. |
Disconnect the connectors.
|
| 7. |
Remove the blower fan (A) and the TED (B) after loosening the screws.
|

Rear Seat - Climate control system Seat Unit
| 1. |
Disconnect the negative (-) battery terminal. |
| 2. |
Remove the rear seat.
(Refer to Body - "Rear Seat Assembly") |
| 3. |
Remove the climate control system seat unit (A) after disconnecting the connectors and loosening the screws.
|
| Installation |
Front Seat - Climate control system Seat Blower
| 1. |
Connect the connector and then install the TED and climate control system duct on the side of the seat back. |
| 2. |
Install the front seat back board. |
| 3. |
Install the blower fan by connecting it to the connector and fixed clip under the front seat cushion. |
| 4. |
Install the TED on the seat cushion. |
| 5. |
Install the front seat cushion. |
| 6. |
Install the front seat. |
| 7. |
Connect the negative (-) battery terminal. |
Front Seat - Climate control system Seat Unit
| 1. |
Install the climate control system seat unit after connecting the connectors. |
| 2. |
Install the front seat. |
| 3. |
Connect the negative (-) battery terminal. |
Rear Seat -Climate control system Seat Blower
| 1. |
Install the blower fan and the TED on the side of rear seat back. |
| 2. |
Install the rear seat back. |
| 3. |
Install the blower fan and the TED under the rear seat cushion. |
| 4. |
Install the rear seat cushion, the duct and bracket. |
| 5. |
Install the rear seat. |
| 6. |
Connect the negative (-) battery terminal. |
Rear Seat - Climate control system Seat Unit
| 1. |
Install the climate control system seat unit after connecting the connectors. |
| 2. |
Install the rear seat. |
| 3. |
Connect the negative (-) battery terminal. |
 Climate Seat Unit Description and Operation
Description
Comparing with the seat heat function by the existing thermic
rays, Climate Control Seat functions the heating,cooling, dehumidifying
by using TED.
It inhales the indoor air throug ...
 Lumbar Support Unit Components and Components Location
Components
Bladder & Massage ECU
...
See also:
LCD Modes
...
Heater Control Unit Components and Components Location
Control Panel
Component
Connector Pin Function
Pin No.Connector AConnector B1GroundIgnition 22-FET (Gate)3Mode Control Actuator (Vent)FET (Drain Feedback)4Mode Control Actuator (Defrost)Sen ...
Indicator Lights
Electronic Stability Control (ESC) Indicator Light
This indicator light illuminates:
Once you set the ignition switch or Engine Start/Stop Button to the ON position.It
illuminates for approx ...
Categories
Hyundai Equus Manuals

© 2011-2026 Copyright www.heqmanual.com