 Hyundai Equus: Floor Console Assembly Repair procedures
Second generation VI (2009–2026) / Hyundai Equus VI 2009-2026 Service Manual / Body (Interior and Exterior) / Floor Console / Floor Console Assembly Repair procedures
Hyundai Equus: Floor Console Assembly Repair procedures
Second generation VI (2009–2026) / Hyundai Equus VI 2009-2026 Service Manual / Body (Interior and Exterior) / Floor Console / Floor Console Assembly Repair procedures
Second generation VI (2009–2026) / Hyundai Equus VI 2009-2026 Service Manual / Body (Interior and Exterior) / Floor Console / Floor Console Assembly Repair procedures
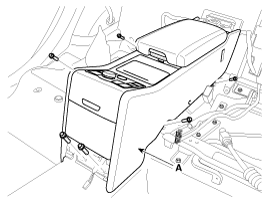
| Replacement |
| [Front Console Assembly] |
|

|

| 1. |
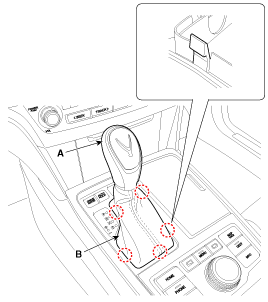
Using a screwdriver or remover, remove the gear boots (B). |
| 2. |
To remove the gear knob (A) and gear boots (B) pull both of it up.
|
| 3. |
Using a screwdriver or remover, remove the front console upper cover (A).
|
| 4. |
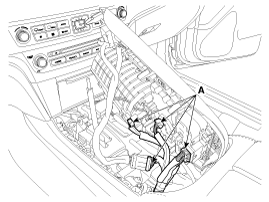
Disconnect the connectors (A).
|
| 5. |
Using a screwdriver or remover, remove the console side cover (A).
[LH]
[RH]
|
| 6. |
Disconnect the floor console main connector (A).
|
| 7. |
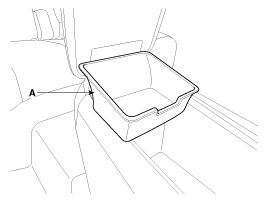
Remove the console armrest tray (A).
|
| 8. |
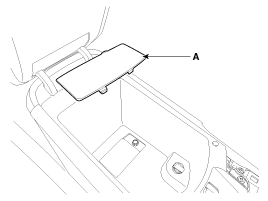
Remove the console armrest service cover (A).
|
| 9. |
After loosening the mounting screws and bolts, then remove the floor console assembly (A).
|
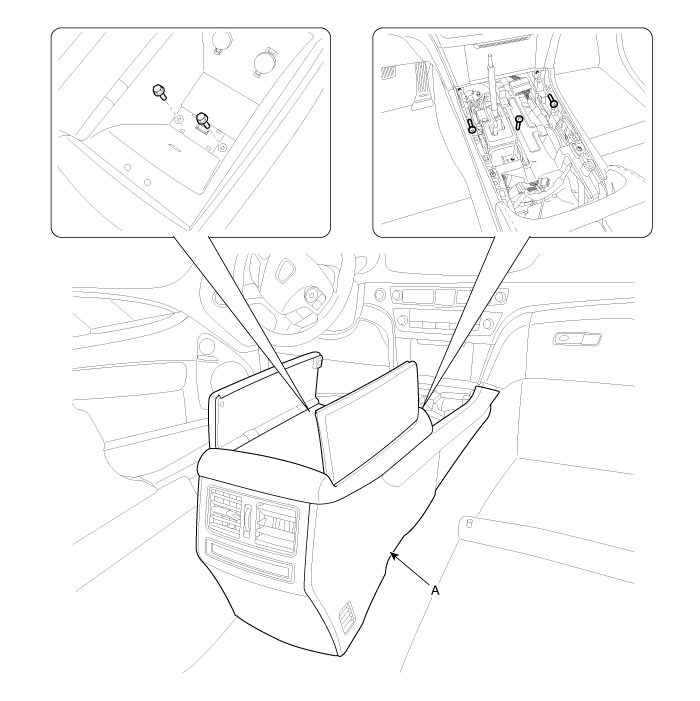
| 10. |
Install in the reverse order of removal.
|

| [Rear Console Assembly] |
| 1. |
Remove the rear seat assembly.
(Refer to Rear Seat - "Rear Seat Assembly") |
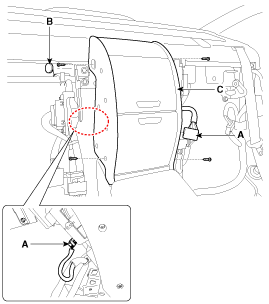
| 2. |
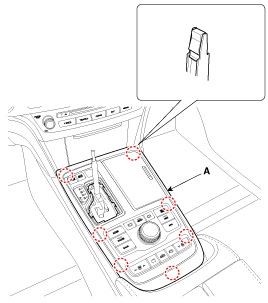
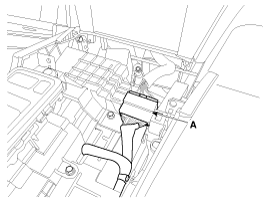
Disconnect the connectors (A). |
| 3. |
Remove the caps (B). |
| 4. |
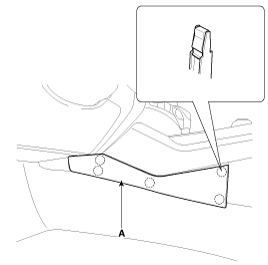
After loosening the mounting bolts, remove the rear tower console complete assembly (C).
|
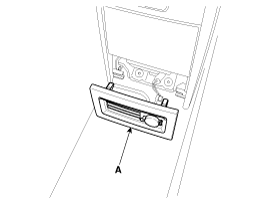
| 5. |
Remove the nozzle assembly (A).
|
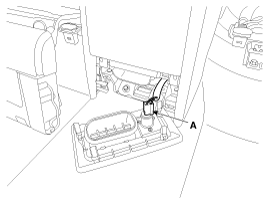
| 6. |
Disconnect the connectors (A).
|
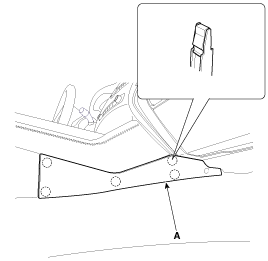
| 7. |
After loosening the mounting bolts, remove the rear floor console complete assembly (A).
|
| 8. |
Install in the reverse order of removal.
|
 Floor Console Assembly Components and Components Location
Component Location
1. Floor console assembly
...
 Rear Console Cover Components and Components Location
Component Location
1. Rear console cover
...
See also:
Special Service Tools
Special Service Tools
Tool (Number and name)IllustrationUseCrankshaft front oil seal installer(09231-2J310)(09231-H1100)Installation of the front oil sealRing gear stopper(09231-2B100)(09231-3N10 ...
Schematic Diagrams
Schematic Diagram
Canister
Canister is filled with charcoal and absorbs evaporated vapor
in fuel tank. The gathered fuel vapor in canister is drawn into the
intake manifold by the ECM/PCM when ...
To control the vehicle height
Push the vehicle height control button to select the HIGH mode that makes the
vehicle higher than the NORMAL mode and the indicator light on the vehicle height
control button will illuminate. It i ...
Categories
Hyundai Equus Manuals

© 2011-2026 Copyright www.heqmanual.com