 Hyundai Equus: Automatic Transmission Repair procedures
Second generation VI (2009–2026) / Hyundai Equus VI 2009-2026 Service Manual / Automatic Transmission System (SBC) / Automatic Transmission System / Automatic Transmission Repair procedures
Second generation VI (2009–2026) / Hyundai Equus VI 2009-2026 Service Manual / Automatic Transmission System (SBC) / Automatic Transmission System / Automatic Transmission Repair procedures
| Removal |
| 1. |
Disconnect (-) terminal from the battery.
|
| 2. |
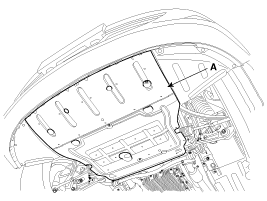
Remove the under cover (A).
|
| 3. |
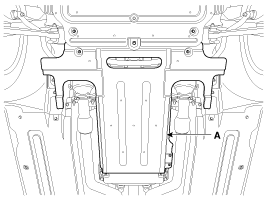
Remove the under cover (A).
|
| 4. |
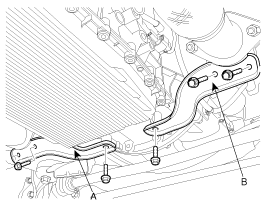
Remove the stay (A) and (B).
|
| 5. |
Disconnect the ground wire (A) by removing the bolt.
|
| 6. |
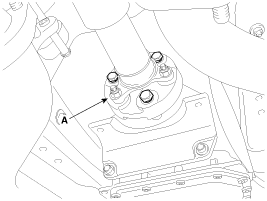
Remove the propellar shaft assembly (A).
(Refer to "Propellar shaft" in DS group)
|
| 7. |
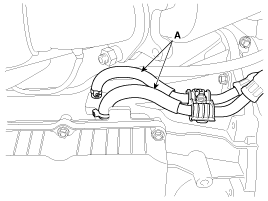
Remove the oil cooler tubes.
|
| 8. |
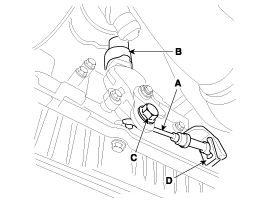
Disconnect the inhibitor switch connector (B). |
| 9. |
Remove the nut (C) and clip (D). |
| 10. |
Remove the shift cable (A).
|
| 11. |
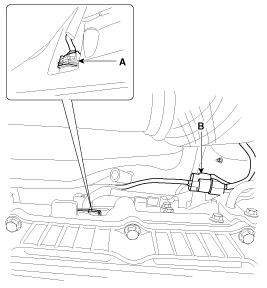
Disconnect the solenoid valve connector (A) and the oxygen sensor connector (B).
|
| 12. |
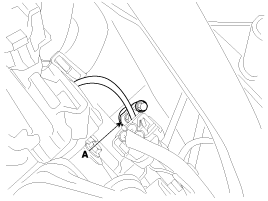
Remove the CKP sensor (A) itself and the brackets for wire.
|
| 13. |
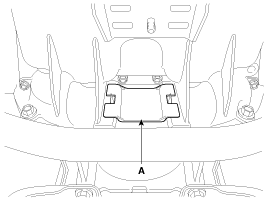
Remove the dust cover (A).
|
| 14. |
Remove the torque converter mounting bolts (A-6ea) by rotating the crank shaft.
|
| 15. |
Using a jack support the transmission assembly. |
| 16. |
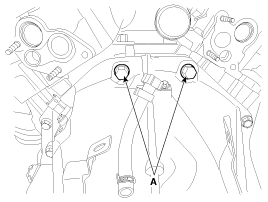
Remove the mounting bolts (A-4ea) lower in the engine side.
|
| 17. |
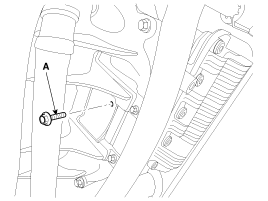
Remove the mounting bolt (A-1ea, B-2ea) left in the transmission side.
|
| 18. |
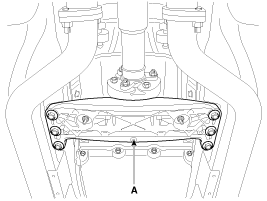
Remove the cross member (A) by removing bolts.
|
| 19. |
Remove the mounting bolts (A-2ea) for the starter motor. |
| 20. |
Remove the mounting bolt (B-1ea).
|
| 21. |
Remove the mounting bolts (A-2ea) on the transmission side.
|
| 22. |
Remove the tansmission assembly by lowering the supporting jack.
|
| Installation |
| 1. |
Install in the reverse order of removal.
|
| 2. |
In case of the reinstallation.
|
| 3. |
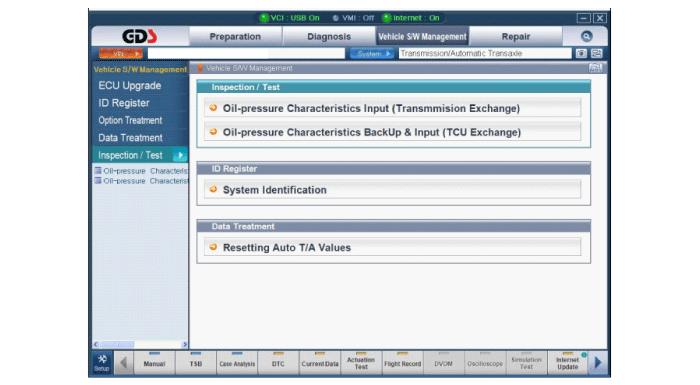
In case of the replacing with a new automatic transaxle.
|
| 4. |
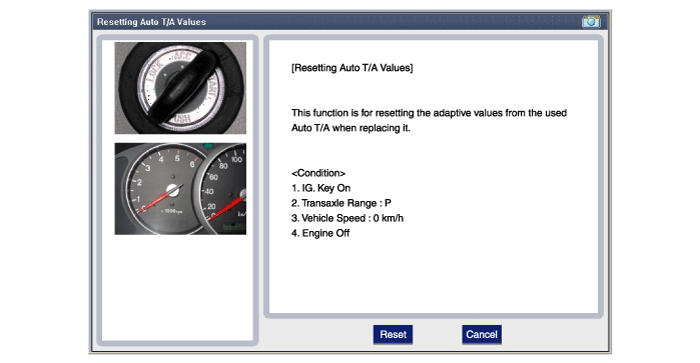
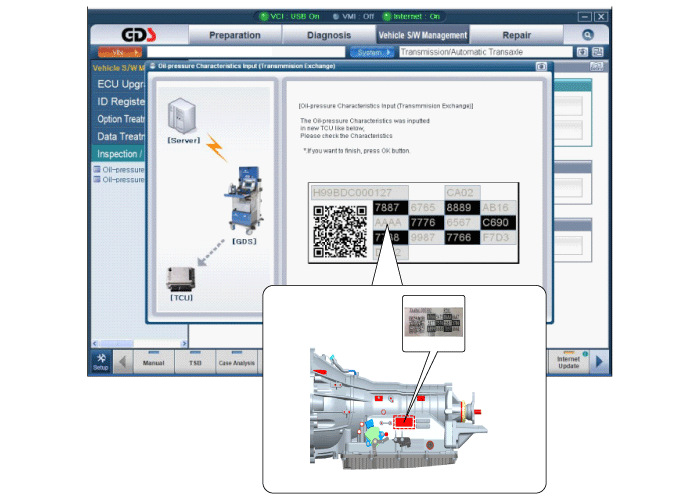
In case of the replacing with a remanufactured automatic transaxle.
|
 Automatic Transmission Components and Components Location
Components Location
1. Automatic transmission case2. Inhibitor switch3. Manual control lever4. Shift cable bracket5. Oil injection hole6. Air breather hose & pipe7. Oil injection hole (in fac ...
 Hydraulic System
...
See also:
Battery saver function
The purpose of this feature is to prevent the battery from being discharged.
The system automatically turns off the parking lights when the driver turns
off the engine and opens the driver-si ...
Engine And Transmission Assembly Repair procedures
Removal
•
Use fender covers to avoid damaging painted surfaces.
•
To avoid damage, unplug the wiring connectors carefully while holding the connector portion.
...
Rear window defroster
The defroster heats the window to remove frost, fog and thin ice from the rear
window, while the engine is running.
To activate the rear window defroster, press the rear window defroster button ...
Categories
Hyundai Equus Manuals
© 2011-2026 Copyright www.heqmanual.com


