 Hyundai Equus: Repair procedures
| Removal |
|

|

| 1. |
Remove the roof side molding.
(Refer to Body Side Moldings - "Roof Side Molding") |
| 2. |
Remove the rear package tray trim.
(Refer to Interior Trim - "Rear Package Tray Trim") |
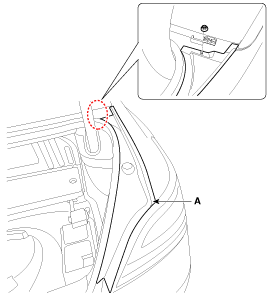
| 3. |
Using a screwdriver or remover, remove the rear glass lower cover (A).
|
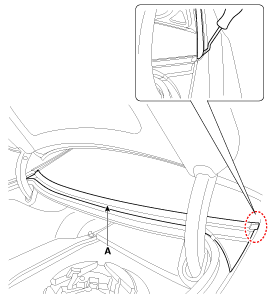
| 4. |
After loosening the mounting nuts, then remove the rear window glass side cover (A).
|
| 5. |
Spread the WD-40 on the side of rear window glass. |
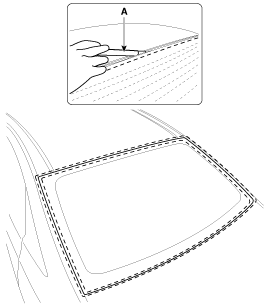
| 6. |
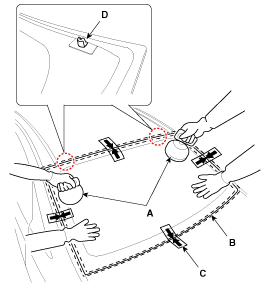
Cut out the adhesive using the cutter (A).
|

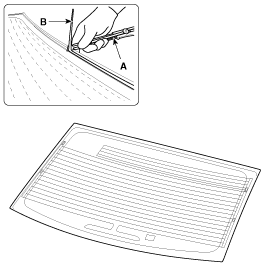
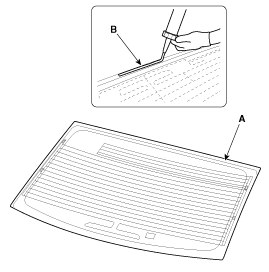
| 7. |
Cut off the sealant on the edge (B) while pulling the piano wire (A) left and right.
|
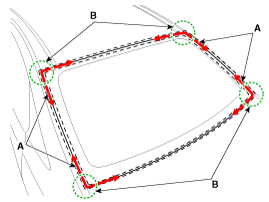
| 8. |
If a piano wire is visible inside the chassis, pull the piano wire (A) line inside.
|
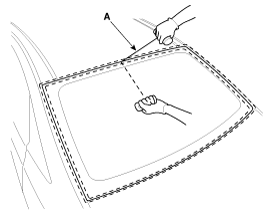
| 9. |
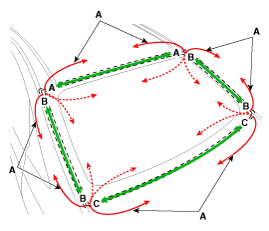
Cut off the sealant on (A-A), (B-B), (C-C), while pulling a piano wire (A) left and right.
|
| 10. |
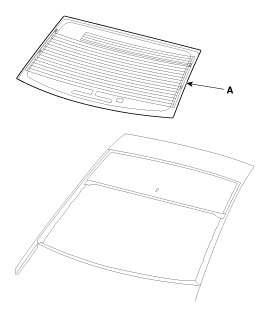
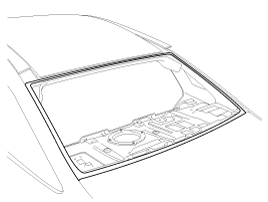
Remove the rear window glass (A).
|
| Installation |
| 1. |
Remove the sealant (B) with a cutting knife (A) on the body panel.
|
| 2. |
Remove the sealant (B) with a cutting knife (A) on the rear window glass.
|
| 3. |
With a sponge, apply a light coat of body primer to the
original adhesive remaining around the rear window glass opening flange.
Let the body primer dry for at least 10 minutes.
|
| 4. |
Apply a light coat of glass primer to the outside of the fasteners.
|
| 5. |
Pack adhesive into the cartridge without air pockets to
ensure continuous delivery. Put the cartridge in a caulking gun, and run
a bead of adhesive (B) around the edge of the rear window glass (A)
between the fastener and molding as shown. Apply the adhesive within 30
minutes after applying the glass primer. Make a slightly thicker bead at
each corner.
|
| 6. |
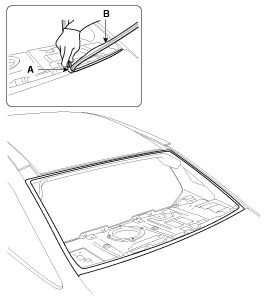
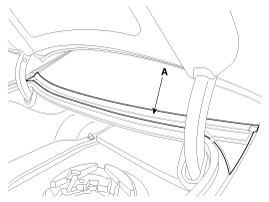
Use suction cups (A) to hold the rear window glass (B) over
the opening, align it with the alignment marks (C) made in step 15, and
set it down on the adhesive. Lightly push on the windshield until its
edges are fully seated on the adhesive all the way around. Do not open
or close the doors until the adhesive is dry.
|
| 7. |
Let the adhesive dry for at least 3-4 hour, then spray water over the glass and check for leaks.
|
| 8. |
Areas may leak. Let the glass dry, then seal with adhesive.
|
| 9. |
Install the rear window glass side cover (A).
|

| 10. |
Install the rear glass lower cover (A).
|
| 11. |
Install the rear package tray trim.
(Refer to Interior Trim - "Rear Package Tray Trim") |
| 12. |
Install the roof side molding.
(Refer to Body Side Moldings - "Roof Side Molding") |
 Components and Components Location
Components
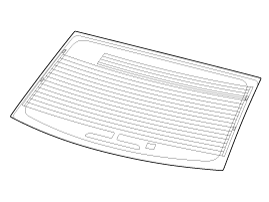
1. Rear window glass
...
 Floor Carpet
...
See also:
Fuel Tank Pressure Sensor (FTPS) Schematic Diagrams
Circuit Diagram
...
Fuel Filler Door Open Switch Repair procedures
Inspection
1.
Remove the front door trim panel.
(Refer to BD group - "Front door")
2.
Check the switch (A) for continuity between the terminals.
3.
If the continuity is not as specified, ...
Air Spring Components and Components Location
Components
1. Urethane pad2. Connected to air tube3. Protector4. Air spring
...
Categories
Hyundai Equus Manuals

© 2011-2026 Copyright www.heqmanual.com