 Hyundai Equus: Height Sensor Repair procedures
Second generation VI (2009–2026) / Hyundai Equus VI 2009-2026 Service Manual / Suspension System / Air Suspension System / Height Sensor Repair procedures
Hyundai Equus: Height Sensor Repair procedures
Second generation VI (2009–2026) / Hyundai Equus VI 2009-2026 Service Manual / Suspension System / Air Suspension System / Height Sensor Repair procedures
Second generation VI (2009–2026) / Hyundai Equus VI 2009-2026 Service Manual / Suspension System / Air Suspension System / Height Sensor Repair procedures
| Removal |
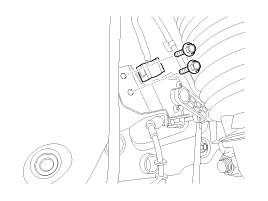
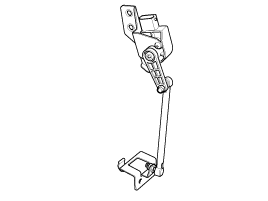
[Front Height Sensor]
|

| 1. |
Removal front wheel & tire .
|
| 2. |
Loosen the bolt and then remove the height sensor (A).
|
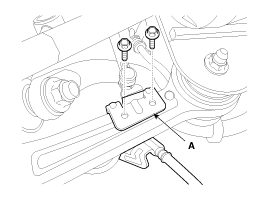
| 3. |
Remove the connector & bolt.
|
| 4. |
Installation is the reverse of removal. |
[Rear Height Sensor]
| 1. |
Remove the rear wheel & tire.
|
| 2. |
Remove the height sensor (B).
|
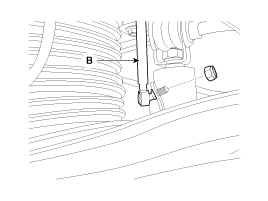
| 3. |
Remove the connector & bolt.
|

| 4. |
Installation is the reverse of removal
|
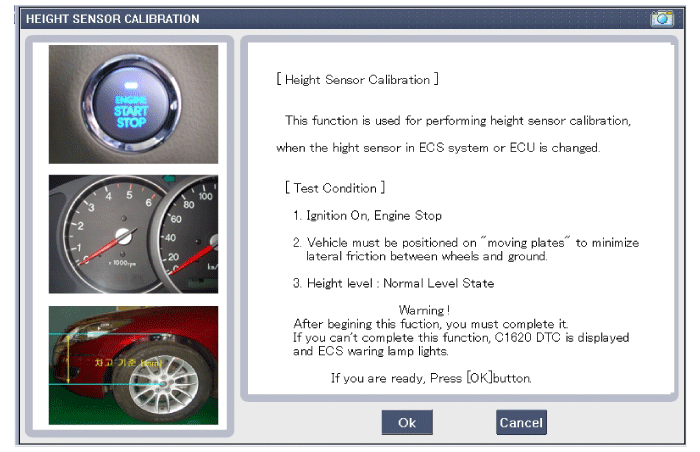
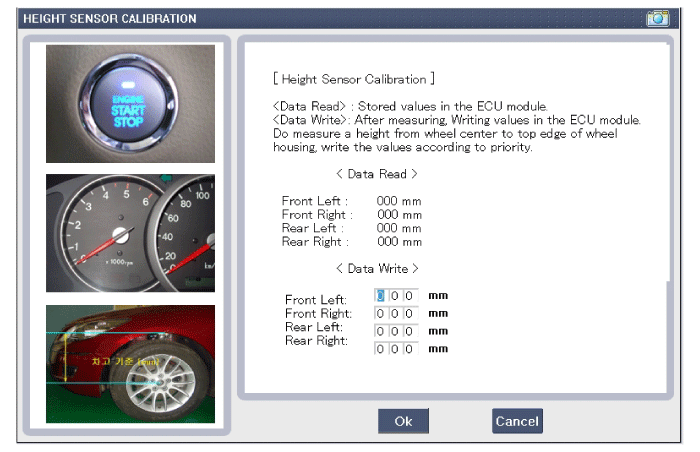
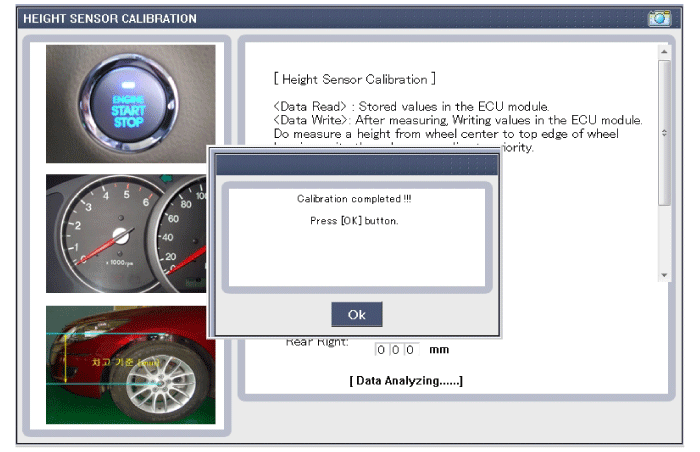
Height sensor calibration
| 1. |
Connect self-diagnosis connector (16pins) located in the
lower of driver side crash pad to self-diagnosis device, and then turn
the self-diagnosis device after key is ON. |
| 2. |
Select the "Vehicle Model" and "Initial Height Sensor Screen" on GDS vehicle selection screen, then select OK.
|
 Height Sensor Schematic Diagrams
Circuit diagram
1.
Height sensor connector
2.
Height sensor terminal function
TerminalFunction1Height Sensor Ground2-3-4-5Height Sensor Power 6Height Sensor Signal
3.
Circuit diagram ...
 G Sensor Components and Components Location
Components Location
1. G-Sensor
...
See also:
Ignition Coil Description and Operation
Description
An ignition coil is an induction coil in an engine's ignition
system which transforms the battery's low voltage to the high voltage
needed to create an electric spark in the spark p ...
Coolant Repair procedures
Engine Coolant Refilling And Bleeding
Never remove the radiator cap when the engine is hot. Serious
scalding could be caused by hot fluid under high pressure escaping from
...
Engine And Transmission Assembly Repair procedures
Removal
•
Use fender covers to avoid damaging painted surfaces.
•
To avoid damage, unplug the wiring connectors carefully while holding the connector portion.
...
Categories
Hyundai Equus Manuals

© 2011-2026 Copyright www.heqmanual.com