
 Hyundai Equus: Automatic Transmission Repair procedures
Second generation VI (2009–2026) / Hyundai Equus VI 2009-2026 Service Manual / Automatic Transmission System (SBC) / Automatic Transmission System / Automatic Transmission Repair procedures
Hyundai Equus: Automatic Transmission Repair procedures
Second generation VI (2009–2026) / Hyundai Equus VI 2009-2026 Service Manual / Automatic Transmission System (SBC) / Automatic Transmission System / Automatic Transmission Repair procedures
Second generation VI (2009–2026) / Hyundai Equus VI 2009-2026 Service Manual / Automatic Transmission System (SBC) / Automatic Transmission System / Automatic Transmission Repair procedures
| Removal |
| 1. |
Disconnect (-) terminal from the battery.
|

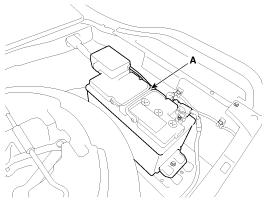
| 2. |
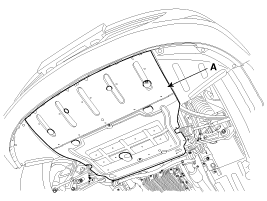
Remove the under cover (A).
|
| 3. |
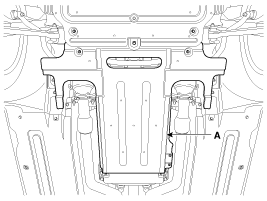
Remove the under cover (A).
|
| 4. |
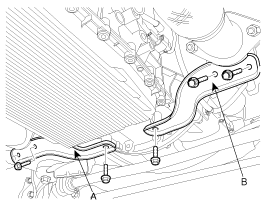
Remove the stay (A) and (B).
|
| 5. |
Disconnect the ground wire (A) by removing the bolt.
|
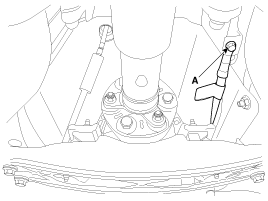
| 6. |
Remove the propellar shaft assembly (A).
(Refer to "Propellar shaft" in DS group)
|
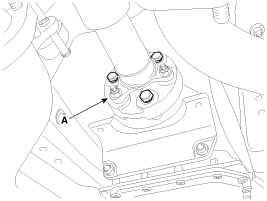
| 7. |
Remove the oil cooler tubes.
|
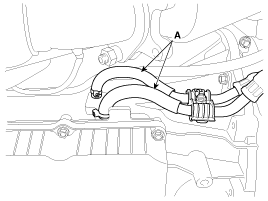
| 8. |
Disconnect the inhibitor switch connector (B). |
| 9. |
Remove the nut (C) and clip (D). |
| 10. |
Remove the shift cable (A).
|
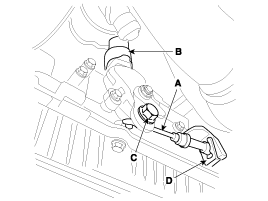
| 11. |
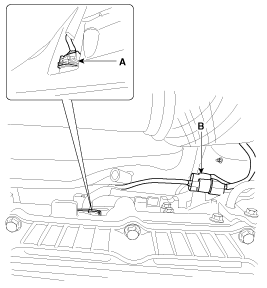
Disconnect the solenoid valve connector (A) and the oxygen sensor connector (B).
|
| 12. |
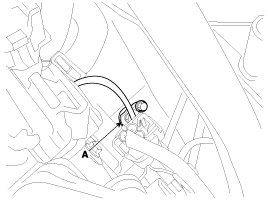
Remove the CKP sensor (A) itself and the brackets for wire.
|
| 13. |
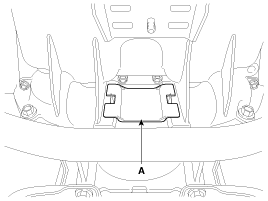
Remove the dust cover (A).
|
| 14. |
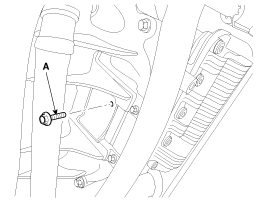
Remove the torque converter mounting bolts (A-6ea) by rotating the crank shaft.
|
| 15. |
Using a jack support the transmission assembly. |
| 16. |
Remove the mounting bolts (A-4ea) lower in the engine side.
|
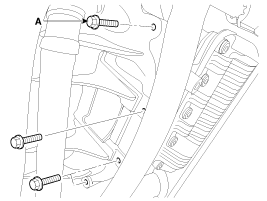
| 17. |
Remove the mounting bolt (A-1ea, B-2ea) left in the transmission side.
|
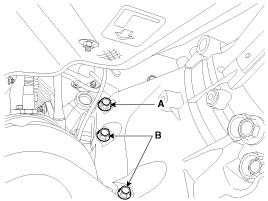
| 18. |
Remove the cross member (A) by removing bolts.
|
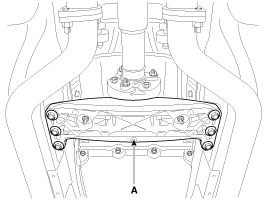
| 19. |
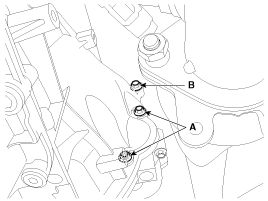
Remove the mounting bolts (A-2ea) for the starter motor. |
| 20. |
Remove the mounting bolt (B-1ea).
|
| 21. |
Remove the mounting bolts (A-2ea) on the transmission side.
|
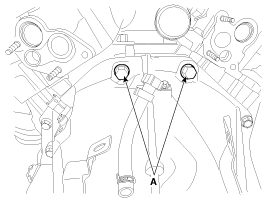
| 22. |
Remove the tansmission assembly by lowering the supporting jack.
|

| Installation |
| 1. |
Install in the reverse order of removal.
|
| 2. |
In case of the reinstallation.
|

| 3. |
In case of the replacing with a new automatic transaxle.
|
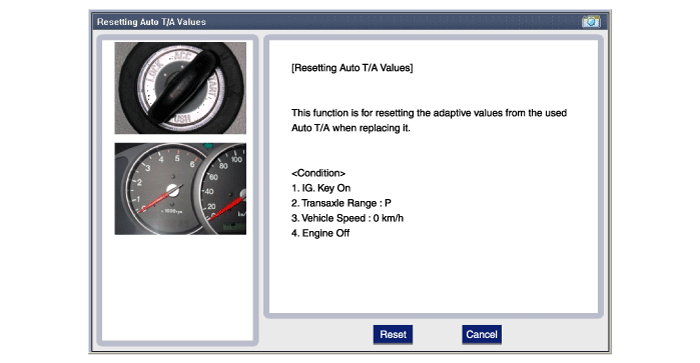
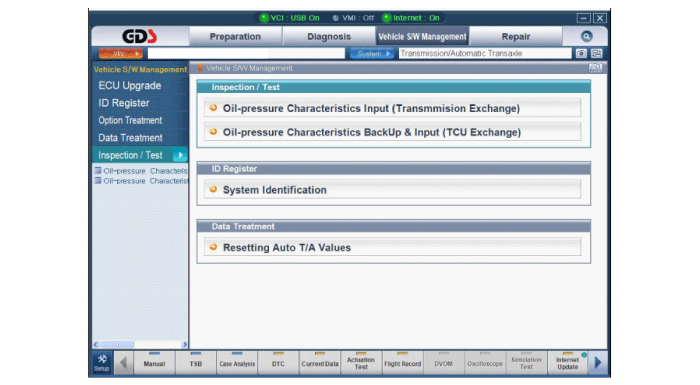
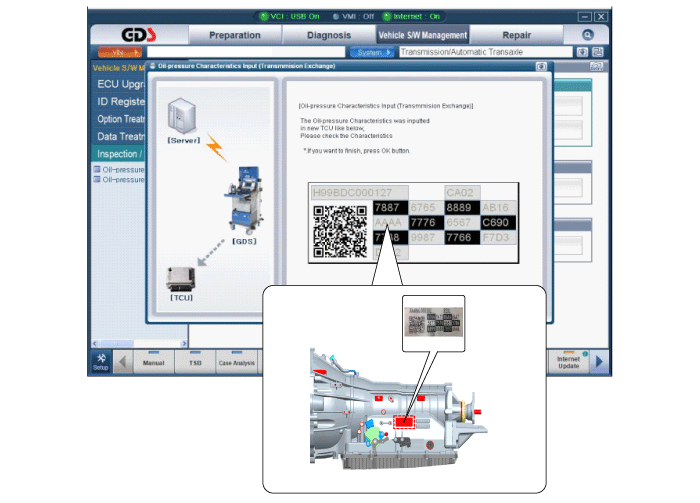
| 4. |
In case of the replacing with a remanufactured automatic transaxle.
|
 Automatic Transmission Components and Components Location
Components Location
1. Automatic transmission case2. Inhibitor switch3. Manual control lever4. Shift cable bracket5. Oil injection hole6. Air breather hose & pipe7. Oil injection hole (in fac ...
 Hydraulic System
...
See also:
3 Zone control button
1. Press the 3 zone button to operate the front passenger's temperature, rear
side temperature, and rear side mode individually. The indicator on the 3 zone button
will be illuminated. Press ...
This device complies with Part 15 of the FCC Rules.
Operation is subject to the following two conditions:
1. This device may not cause harmful interference, and
2. This device must accept any interference received, including interference that
may c ...
Operating HomeLink®
To operate, simply press and release the programmed HomeLink® button. Activation
will now occur for the trained device (i.e. garage door opener, gate operator, security
system, entry door lock, h ...
Categories
Hyundai Equus Manuals

© 2011-2026 Copyright www.heqmanual.com