| • |
Put on gloves to protect your hands. |
|
| • |
When prying with a flat-tip screwdriver, wrap it with
protective tape, and apply protective tape around the related parts, to
prevent damage. |
| • |
Take care not to scratch the body surface. |
|
| 1. |
Loosen the side sill molding mounting screws. |
| 2. |
Using a screwdriver or remover, remove the side sill molding (A). 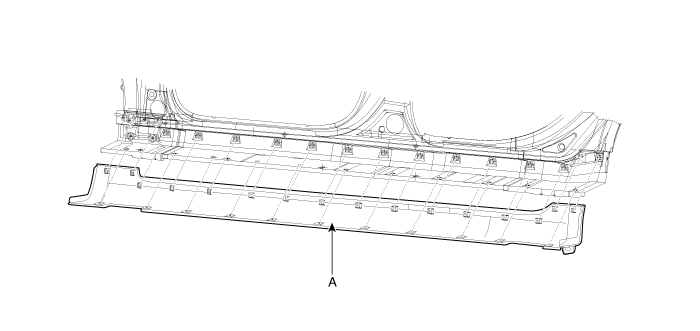
|
| 3. |
Install in the reverse order of removal.
| • |
Replace any damaged clips. |
|
|
Replacement
•
Put on gloves to protect your hands.
•
When prying with a flat-tip screwdriver, wrap it with
protective tape, and apply p ...
Replacement
[B Pillar upper garnish]
•
Put on gloves to protect your hands.
•
When prying with a flat-tip screwdriver, wrap it with
pr ...
See also:
LCD Modes
...
Head Up Display Unit Repair procedures
Removal
1.
Disconnect the negative (-) battery terminal.
2.
Remove the head up display bezel (A).
3.
Remove the instrument cluster.
(Refer to Indicators And Guages - "Instrument Cluster") ...
Console Armrest Repair procedures
Replacement
[Front Console Armrest]
•
Put on gloves to protect your hands.
•
When prying with a flat-tip screwdriver, wrap it with
prot ...

 Hyundai Equus: Side Sill Molding Repair procedures
Second generation VI (2009–2026) / Hyundai Equus VI 2009-2026 Service Manual / Body (Interior and Exterior) / Body Side Molding / Side Sill Molding Repair procedures
Hyundai Equus: Side Sill Molding Repair procedures
Second generation VI (2009–2026) / Hyundai Equus VI 2009-2026 Service Manual / Body (Interior and Exterior) / Body Side Molding / Side Sill Molding Repair procedures


 Waist Line Molding Repair procedures
 B Pillar Garnish Repair procedures