 Hyundai Equus: Lower Arm Repair procedures
Second generation VI (2009–2025) / Hyundai Equus VI 2009-2025 Service Manual / Suspension System / Air Suspension System / Lower Arm Repair procedures
Second generation VI (2009–2025) / Hyundai Equus VI 2009-2025 Service Manual / Suspension System / Air Suspension System / Lower Arm Repair procedures
| Removal |
| [Front Lower Arm] |
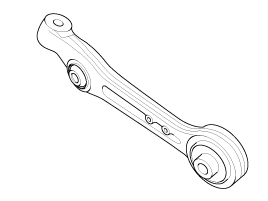
Replacement the lateral arm
| 1. |
Removal the front wheel & tire.
|
| 2. |
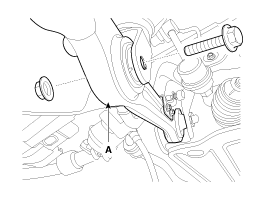
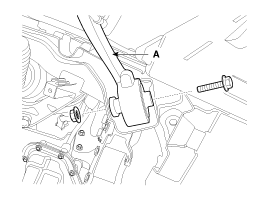
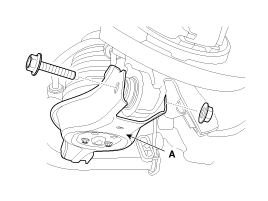
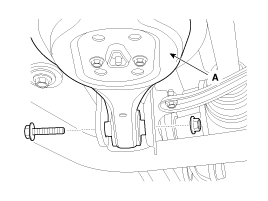
Disconnect the lateral arm (A) from the air strut assembly bracket by loosening the bolt & nut.
|
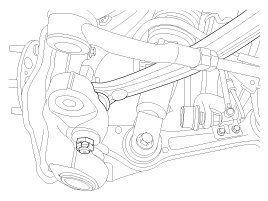
| 3. |
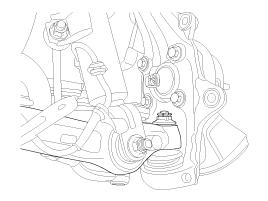
Removal the split pin and castle nut.
|
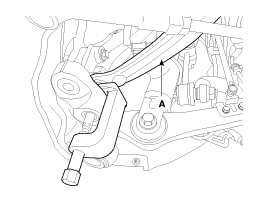
| 4. |
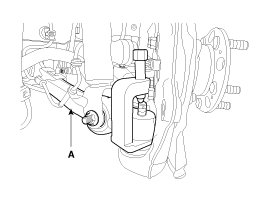
Disconnect the lateral arm (A) from the front knuckle using a SST (09568-2J100).
|
| 5. |
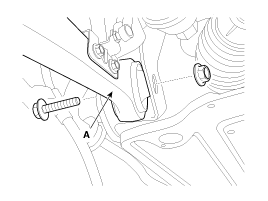
Disconnect the lateral arm (A) from the frame by loosening the bolt & nut.
|
| 6. |
Installation is the reverse of removal.
|
Replacement the tension arm
| 1. |
Remove the front wheel & tire.
|
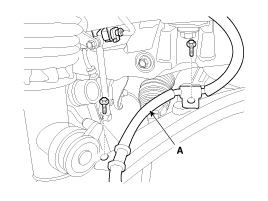
| 2. |
Disconnect the brake hose (A) from the tension arm by loosening the bolt.
|
| 3. |
Removal the split pin and castle nut.
|
| 4. |
Disconnect the tension arm (A) from the front knuckle using a SST (09568-2J100).
|
| 5. |
Disconnect the tension arm (A) from the sub frame by loosening the bolt.
|
| 6. |
Installation is the reverse of removal. |
| [Rear Lower Arm] |
| 1. |
Remove the rear wheel & tire.
|
| 2. |
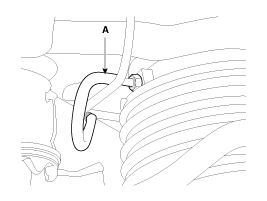
Remove the air tube (A).
|
| 3. |
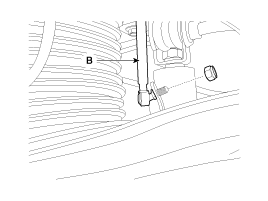
Disconnect the rear stabilizer link (A) & height sensor (B) from the rear lower arm by loosening the nut.
|
| 4. |
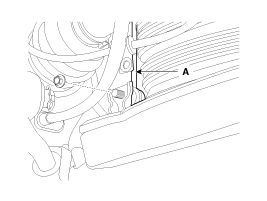
Loosen the cam bolt & lock nut and then remove the lower arm (A).
|
| 5. |
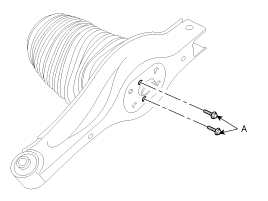
Disconnect the air spring from the rear lower arm by loosening the bolt (A).
|
| 6. |
Installation is the reverse of removal.
|
| Inspection |
| 1. |
Check the bushing for wear and deterioration. |
| 2. |
Check the ball joint for rotating torque. |
 G Sensor Repair procedures
Removal
•
be careful to avoid excessive external shock.
•
connectors to avoid damage to the connector pins.
G-sensor FL
1.
Remove the front bumper.
(Refer ...
 Stabilizer Bar Repair procedures
Removal
[Front Stabilizer Bar]
1.
Removal the front wheel & tire.
Tightening torque :
90.0 ~ 110.0 N.m(9.0 ~ 11.0 kgf.m, 65.0 ~ 80.0 lb-ft)
2.
Disconnect the stabilizer link (A) ...
See also:
Erasing HomeLink® buttons
Individual buttons cannot be erased. However, to erase all three programmed buttons:
1. Press and hold the two outer HomeLink® buttons until the indicator light begins
to flash-after 20 seconds.
...
Tire specification and pressure label
The tires supplied on your new vehicle are chosen to provide the best performance
for normal driving.
The tire label located on the driver's side center pillar gives the tire pressures
re ...
Side Airbag (SAB) Module Components and Components Location
Components
...
Categories
Hyundai Equus Manuals
© 2011-2025 Copyright www.heqmanual.com

