 Hyundai Equus: Instrument Cluster Repair procedures
Second generation VI (2009–2026) / Hyundai Equus VI 2009-2026 Service Manual / Body Electrical System / Indicators And Gauges / Instrument Cluster Repair procedures
Hyundai Equus: Instrument Cluster Repair procedures
Second generation VI (2009–2026) / Hyundai Equus VI 2009-2026 Service Manual / Body Electrical System / Indicators And Gauges / Instrument Cluster Repair procedures
Second generation VI (2009–2026) / Hyundai Equus VI 2009-2026 Service Manual / Body Electrical System / Indicators And Gauges / Instrument Cluster Repair procedures
| Removal |
| 1. |
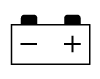
Disconnect the negative (-) battery terminal. |
| 2. |
Remove the cluster fascia panel after loosening the screws.
(Refer to Body - "Cluster Fascia Panel") |
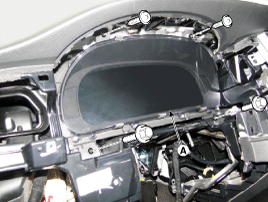
| 3. |
Remove the cluster assembly (A) after loosening the mounting bolts and nuts.
|
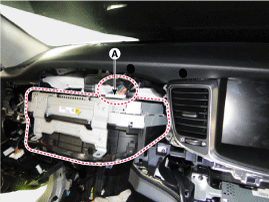
| 4. |
Disconnect the cluster connector (A).
|
| Installation |
| 1. |
Install the cluster assmebly after connecting the connector. |
| 2. |
Install the cluster fascia panel. |
| 3. |
Connect the negative (-) battery terminal. |
| Inspection |
| 1. |
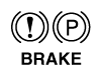
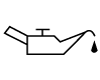
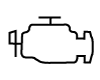
Check point (Warning indicator)
|


| 2. |
Check point (Gauge)
|
| 3. |
Connector terminal check list
| ||||||||||||||||||||||||||||||||||||||||||||||||||||||||||||||||||||||||||||||||||||||||||||||||||||||||||||||||||||||||||||||||||||||||||||||||||||||||||||||||||||||||||||||||||||||||||||||||||||||||||||||||||||||||||||||||||||||||||||||||||||||||||||
| 4. |
Communication information
|
| 5. |
Other cluster check list
|
 UMS settings are sent to BCM >
 Settings are sent via BCM B_CAN to the relevant module >
  When the module setting is completed, the current settings are sent to BCM >
  The final settings are sent via BCM C-CAN to the dashboard.
  HUD-related settings of UMS are sent >
 HUD light brightness/height settings are sent to display the final setti ngs
 Diagnosis with GDS
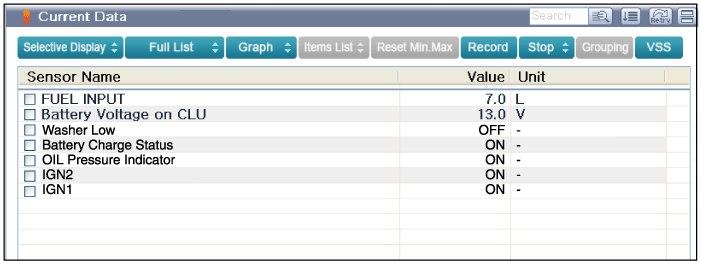
| 1. |
It will be able to diagnose defects of CLU with GDS quickly.
GDS can operates actuator forcefully, input/output value monitoring and
self diagnosis. |
| 2. |
Select model and "BCM". |
| 3. |
Select the "Cluster Moduel" to check. |
| 4. |
Select "Input/output monitoring", if you will check current data of instrument cluster. |
| 5. |
If you will check each module data operation forcefully, select "Actuation test".
|
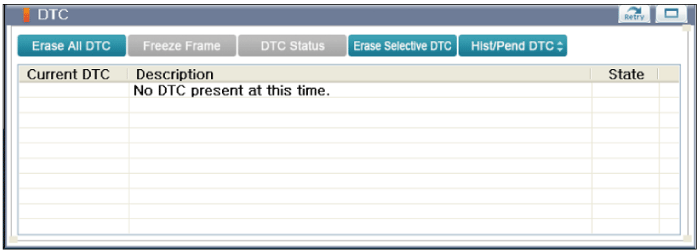
| 6. |
To check the DTC of the each module, select "DIAGNOSTIC TROUBLE CODES".
|
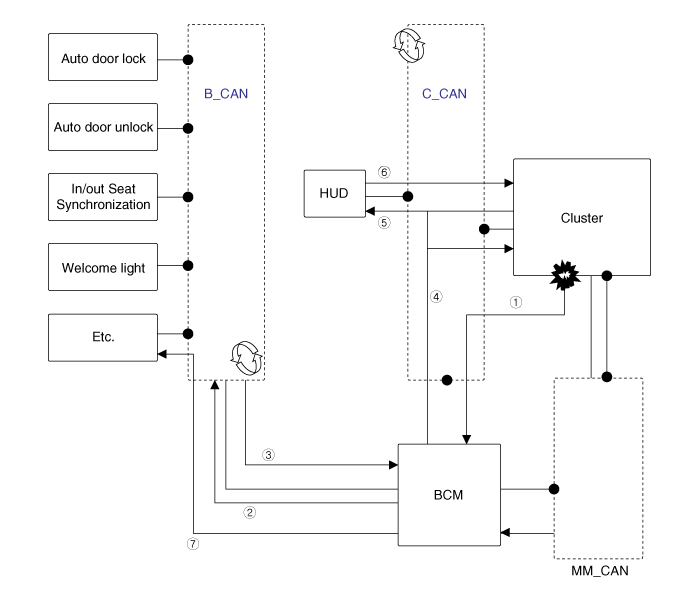
 Instrument Cluster Description and Operation
Description
Communication Network Diagram
Refer to the "Body Network System" for the abbreviation information.
Function
1.
High speed CAN communication (C-CAN)
(1)
Use ...
 Troubleshooting
Troubleshooting
Error ItemFailure symptomInspection items Detailed inspections Relevant Parts/ComponentsScreen displayTFT-LCD screen does not turn on
1.
Connector attachments
2.
Components
...
See also:
Repair procedures
Inspection
Front Door Lock Module Inspection
1.
Remove the front door trim.
(Refer to Body - "Front Door Trim")
2.
Remove the front door module.
(Refer to Body - "Front Door Module")
3.
...
Non-operational conditions of parking assist system
Parking assist system may not operate normally when:
1. Moisture is frozen to the sensor. (It will operate normally when moisture
melts.)
2. Sensor is covered with foreign matter, such as snow or ...
Glove Box Housing Repair procedures
Replacement
•
Put on gloves to protect your hands.
•
When prying with a flat-tip screwdriver, wrap it with
protective tape, and apply pr ...
Categories
Hyundai Equus Manuals

© 2011-2026 Copyright www.heqmanual.com