 Hyundai Equus: Compressor Repair procedures
Second generation VI (2009–2024) / Hyundai Equus VI 2009-2024 Service Manual / Suspension System / Air Suspension System / Compressor Repair procedures
Hyundai Equus: Compressor Repair procedures
Second generation VI (2009–2024) / Hyundai Equus VI 2009-2024 Service Manual / Suspension System / Air Suspension System / Compressor Repair procedures
Second generation VI (2009–2024) / Hyundai Equus VI 2009-2024 Service Manual / Suspension System / Air Suspension System / Compressor Repair procedures
| Removal |
|

| 1. |
Removal the front bumper.
(Refer to Body - "Front bumper") |
| 2. |
Removal the left head amp.
(Refer to Body Electrical System - "Head lamp leveling device") |
| 3. |
Removal the EHPS motor.
(Refer to Steering System - "Power steering motor") |
| 4. |
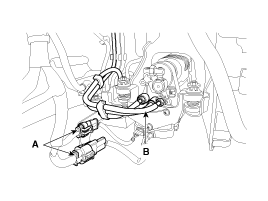
Disconnect the connector (A) & air hose (B).
|

| 5. |
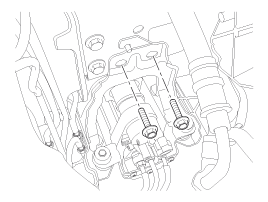
Remove the bracket bolt.
|
| 6. |
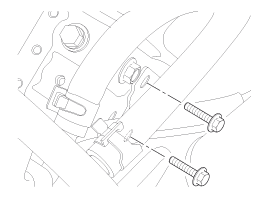
Disconnect the solenoid valve (A) from the compressor by loosening the bolt.
|
| 7. |
Installation is the reverse of removal.
|
 Compressor Schematic Diagrams
Circuit diagram
1.
Air compressor connector
[Motor power connector (A)][Exhaust valve connector (B)][Temperature sensor connector (C)]
2.
Air compressor terminal function
[Motor power]
...
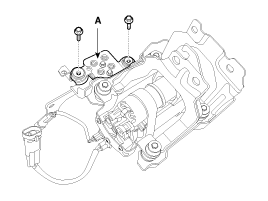
 Solenoid Valve Components and Components Location
Components
1. Connected to air tube2. Bracket3. Connector
...
See also:
Crankshaft Position Sensor (CKPS) Specifications
Specification
ItemSpecificationCoil Resistance (x)774 ~ 946 [20°C (68°F)]Air cap(mm)0.5 ~ 1.5
...
Battery recharging by battery charger
Your vehicle has a maintenance-free, calcium-based battery.
If the battery becomes discharged in a short time (because, for example,
the headlights or interior lights were left on while the veh ...
Driver's and passenger's front air bag
Your vehicle is equipped with a Supplemental Restraint (Air Bag) System and the
lap/shoulder belts at both the driver and passenger seating positions.
The indications of the system's presence ...
Categories
Hyundai Equus Manuals

© 2011-2024 Copyright www.heqmanual.com