 Hyundai Equus: Room Lamp Repair procedures
Second generation VI (2009–2024) / Hyundai Equus VI 2009-2024 Service Manual / Body Electrical System / Lighting System / Room Lamp Repair procedures
Hyundai Equus: Room Lamp Repair procedures
Second generation VI (2009–2024) / Hyundai Equus VI 2009-2024 Service Manual / Body Electrical System / Lighting System / Room Lamp Repair procedures
Second generation VI (2009–2024) / Hyundai Equus VI 2009-2024 Service Manual / Body Electrical System / Lighting System / Room Lamp Repair procedures
| Removal |
| 1. |
Disconnect the negative (-) battery terminal. |
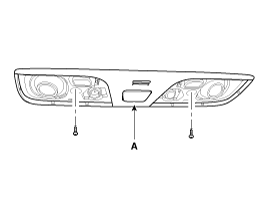
| 2. |
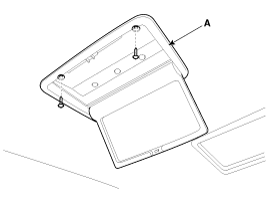
Detach the lamp lens and reflector (A) from the room lamp with a flat-tip screwdriver.
|
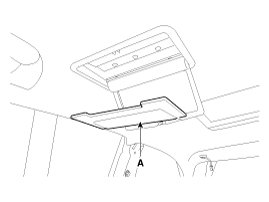
| 3. |
Remove the room lamp (A) after removing the screws.
|
| 4. |
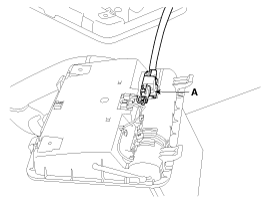
Replace the room lamp after removing the connectors (A).
|
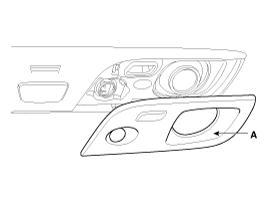
Vanity Lamp
| 1. |
Disconnect the negative (-) battery terminal. |
| 2. |
Remove the lens (A) using a flat-tip screwdriver.
|
| 3. |
Remove the vanity lamp (A) after loosening the mounting screws.
|
| 4. |
Remove the vanity lamp assembly after disconnecting the connector (A).
|
| Installation |
Room Lamp
| 1. |
Connect the connector and install the room lamp. |
| 2. |
Install the lamp reflector and lamp len. |
Vanity Lamp
| 1. |
Install the vanity lamp. |
| 2. |
Install the lens. |
| Inspection |
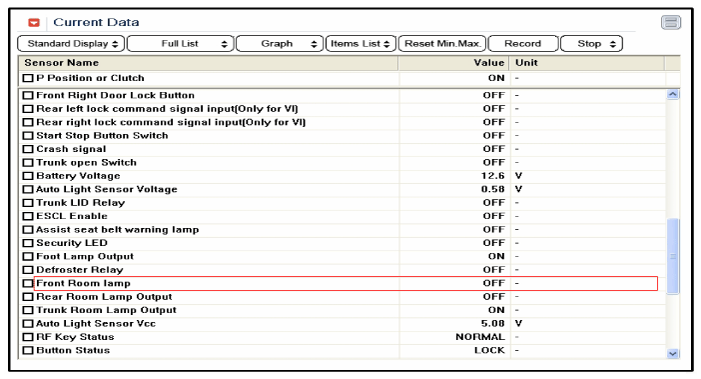
| 1. |
Check "IPM" input/output specification of room lamp using the GDS. |
| 2. |
Select option "Input/output monitoring".
|
| 3. |
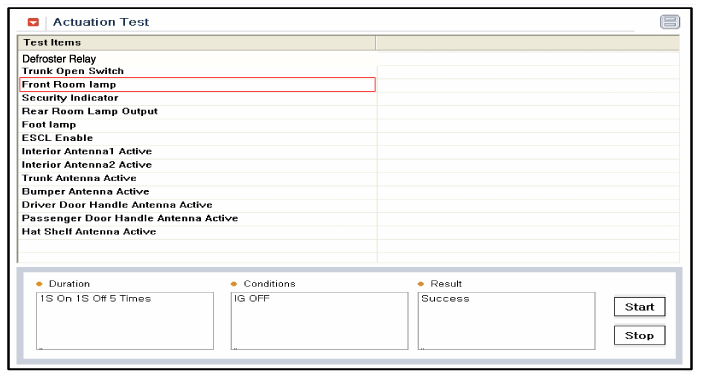
Select option "Actuation Test" to perform functional test.
|
 Rear combination lamp Repair procedures
Removal
1.
Disconnect the negative (-) battery terminal.
2.
Loose the nuts holding the rear combination lamp (outside) then disconnect the connector (A).
3.
Remove the rear combination la ...
 Overhead Console Lamp Repair procedures
Removal
1.
Disconnect the negative (-) battery terminal.
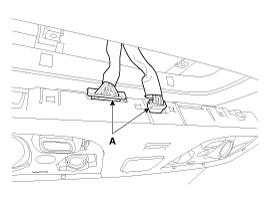
2.
Remove the overhead console lamp (A) after loosening the overhead console lamp screw(2EA).
3.
Disconnect the sunroof switch conn ...
See also:
Rain Sensor Description and Operation
Description
Integrated Rain Sensor
Integrated rain sensor (A) controls three systems: front wiper, auto-light, and central air conditioner.
1.
Wiper Control System
When "AUTO" switch signal i ...
Brake Pedal Repair procedures
Removal
1.
Remove the lower crash pad.
(Refer to Body - "Crash Pad")
2.
Disconnect the stop lamp switch connector (A).
3.
Remove the mounting bracket nut (B).
Tightening torque :
14. ...
Aux, USB and iPod® port
If your vehicle has an aux and/or USB(universal serial bus) port or iPod® port,
you can use an aux port to connect audio devices and a USB port to plug in a USB,
and an iPod® port to plug in a ...
Categories
Hyundai Equus Manuals

© 2011-2024 Copyright www.heqmanual.com