 Hyundai Equus: Automatic Transmission Repair procedures
Second generation VI (2009–2024) / Hyundai Equus VI 2009-2024 Service Manual / Automatic Transmission System (SBC) / Automatic Transmission System / Automatic Transmission Repair procedures
Hyundai Equus: Automatic Transmission Repair procedures
Second generation VI (2009–2024) / Hyundai Equus VI 2009-2024 Service Manual / Automatic Transmission System (SBC) / Automatic Transmission System / Automatic Transmission Repair procedures
Second generation VI (2009–2024) / Hyundai Equus VI 2009-2024 Service Manual / Automatic Transmission System (SBC) / Automatic Transmission System / Automatic Transmission Repair procedures
| Removal |
| 1. |
Disconnect (-) terminal from the battery.
|

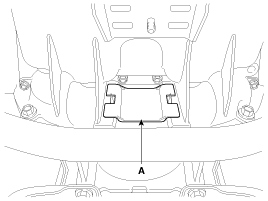
| 2. |
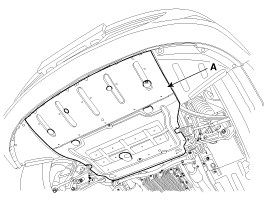
Remove the under cover (A).
|
| 3. |
Remove the under cover (A).
|
| 4. |
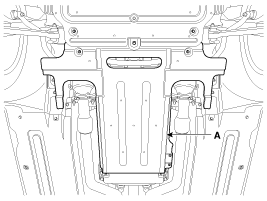
Remove the stay (A) and (B).
|
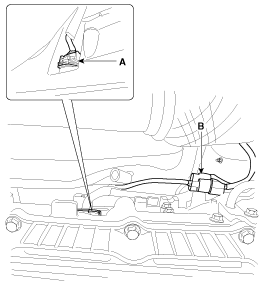
| 5. |
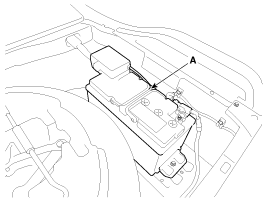
Disconnect the ground wire (A) by removing the bolt.
|

| 6. |
Remove the propellar shaft assembly (A).
(Refer to "Propellar shaft" in DS group)
|
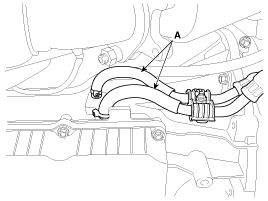
| 7. |
Remove the oil cooler tubes.
|
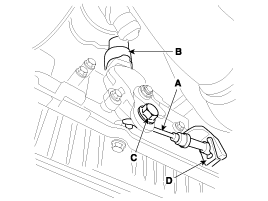
| 8. |
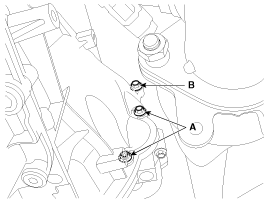
Disconnect the inhibitor switch connector (B). |
| 9. |
Remove the nut (C) and clip (D). |
| 10. |
Remove the shift cable (A).
|
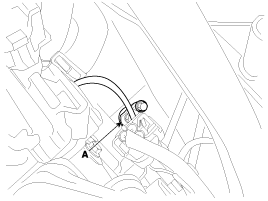
| 11. |
Disconnect the solenoid valve connector (A) and the oxygen sensor connector (B).
|
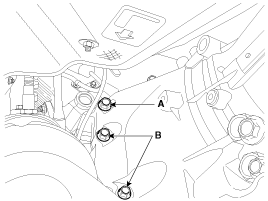
| 12. |
Remove the CKP sensor (A) itself and the brackets for wire.
|
| 13. |
Remove the dust cover (A).
|
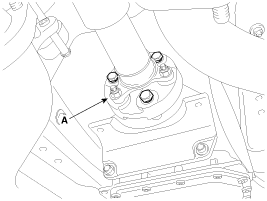
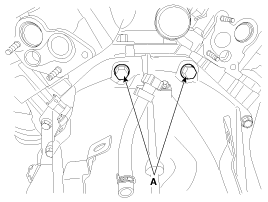
| 14. |
Remove the torque converter mounting bolts (A-6ea) by rotating the crank shaft.
|
| 15. |
Using a jack support the transmission assembly. |
| 16. |
Remove the mounting bolts (A-4ea) lower in the engine side.
|

| 17. |
Remove the mounting bolt (A-1ea, B-2ea) left in the transmission side.
|
| 18. |
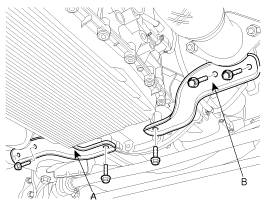
Remove the cross member (A) by removing bolts.
|
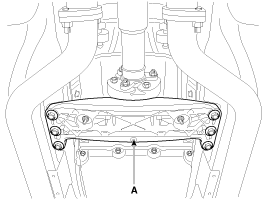
| 19. |
Remove the mounting bolts (A-2ea) for the starter motor. |
| 20. |
Remove the mounting bolt (B-1ea).
|
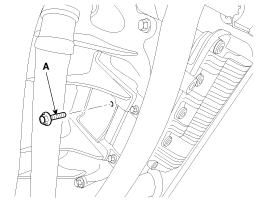
| 21. |
Remove the mounting bolts (A-2ea) on the transmission side.
|
| 22. |
Remove the tansmission assembly by lowering the supporting jack.
|

| Installation |
| 1. |
Install in the reverse order of removal.
|
| 2. |
In case of the reinstallation.
|

| 3. |
In case of the replacing with a new automatic transaxle.
|
| 4. |
In case of the replacing with a remanufactured automatic transaxle.
|
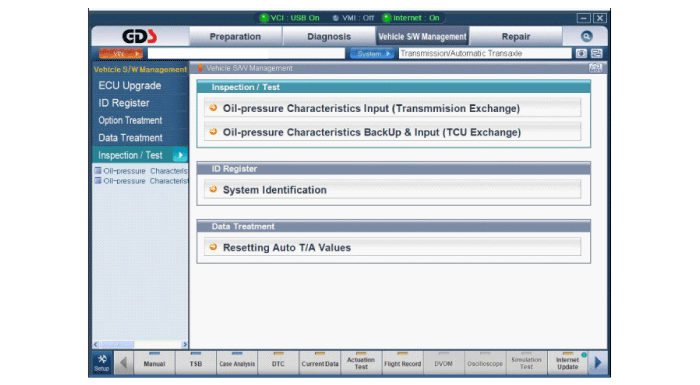
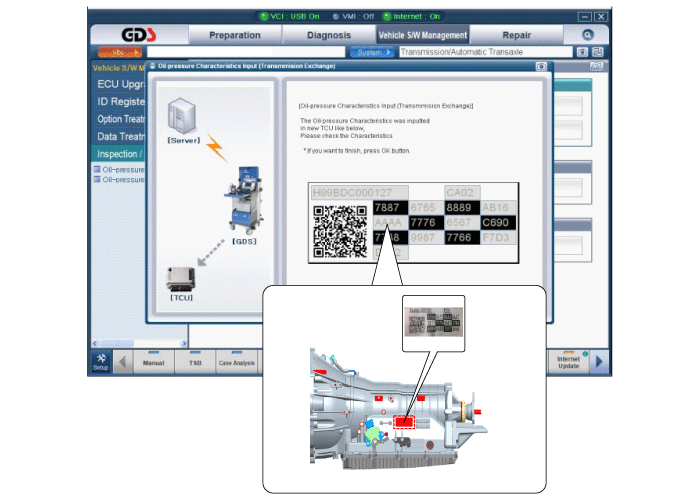
 Automatic Transmission Components and Components Location
Components Location
1. Automatic transmission case2. Inhibitor switch3. Manual control lever4. Shift cable bracket5. Oil injection hole6. Air breather hose & pipe7. Oil injection hole (in fac ...
 Hydraulic System
...
See also:
Power Latch Repair procedures
Removal
1.
Disconnect the negative (-) battery terminal.
2.
Remove the trunk trim in the trunk.
(Refer to Body - "Trunk")
3.
Remove the power latch (A) after removing the bolts (2EA) and ...
Description and Operation
Refrigeration Cycle
...
Front Upper Arm Repair procedures
Removal
1.
Remove the front wheel and tire (A) from front hub .
Tightening torque:
88.3 ~ 107.9 N.m (9.0 ~ 11.0 kgf.m, 65.1 ~ 79.6 lb-ft)
•
Be careful not to damage ...
Categories
Hyundai Equus Manuals

© 2011-2024 Copyright www.heqmanual.com