 Hyundai Equus: Rear Bumper Cover Repair procedures
Second generation VI (2009–2026) / Hyundai Equus VI 2009-2026 Service Manual / Body (Interior and Exterior) / Rear Bumper / Rear Bumper Cover Repair procedures
Second generation VI (2009–2026) / Hyundai Equus VI 2009-2026 Service Manual / Body (Interior and Exterior) / Rear Bumper / Rear Bumper Cover Repair procedures
| Replacement |
|
|
| • |
When prying with a flat-tip screwdriver, wrap it with
protective tape, and apply protective tape around the related parts, to
prevent damage. |
| • |
Use a plastic panel removal tool to remove interior trim pieces to protect from marring the surface. |
| • |
Take care not to bend or scratch the trim and panels. |
| 1. |
Remove the rear transverse trim.
(Refer to "Trunk Trim") |
| 2. |
Remove the luggage covering complete.
(Refer to "Trunk Trim") |
| 3. |
Remove the luggage under cover.
(Refer to "Trunk Trim") |
| 4. |
Remove the luggage side trim.
(Refer to "Trunk Trim") |
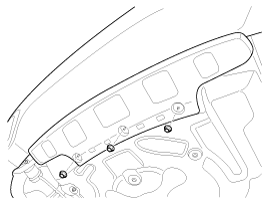
| 5. |
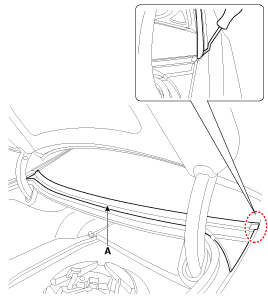
Using a screwdriver or remover, remove the rear glass lower cover (A).
|
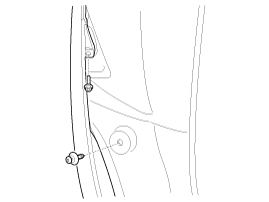
| 6. |
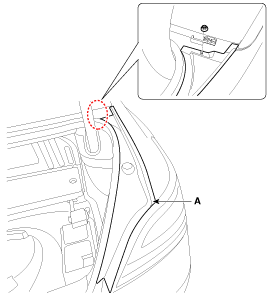
After loosening the mounting nuts, then remove the rear window glass side cover (A).
|
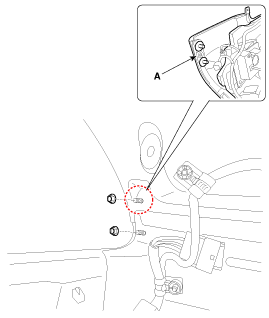
| 7. |
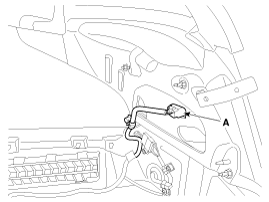
Disconnect the connector (A), and then loosen the rear combination lamp mounting nuts.
|
| 8. |
Loosen the rear bumper lower mounting clips.
|
| 9. |
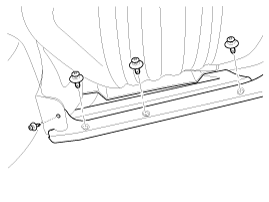
Loosen the rear bumper lower mounting nuts.
|
| 10. |
After loosening the rear bumper side's mounting screw and clips, then disconnect the side's.
|
| 11. |
Loosen the rear bumper side upper bracket mounting nut.
|
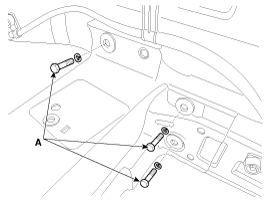
| 12. |
Loosen the rear bumper mounting bolt (A) inside of the trunk.
|
| 13. |
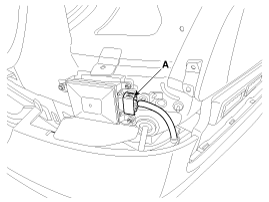
Disconnect the rear bumper main connector (A).
|
| 14. |
Install in the reverse order of removal.
|
 Rear Bumper Cover Components and Components Location
Component Location
1. Rear bumper cover
...
 Rear Bumper Beam Assembly Components and Components Location
Component Location
1. Rear bumper beam assembly
...
See also:
High Pressure Fuel Pump Repair procedures
Removal
In case of removing the high pressure fuel pump, high
pressure fuel pipe, delivery pipe, and injector, there may be injury
caused by leakage of the high pressure f ...
Automatic Transmission Components and Components Location
Components Location
1. Automatic transmission case2. Inhibitor switch3. Manual control lever4. Shift cable bracket5. Oil injection hole6. Air breather hose & pipe7. Oil injection hole (in fac ...
Air conditioning refrigerant
Check the air conditioning lines and connections for leakage and damage. ...
Categories
Hyundai Equus Manuals
© 2011-2026 Copyright www.heqmanual.com


