
 Hyundai Equus: Front Air Strut Assembly Repair procedures
Second generation VI (2009–2026) / Hyundai Equus VI 2009-2026 Service Manual / Suspension System / Air Suspension System / Front Air Strut Assembly Repair procedures
Hyundai Equus: Front Air Strut Assembly Repair procedures
Second generation VI (2009–2026) / Hyundai Equus VI 2009-2026 Service Manual / Suspension System / Air Suspension System / Front Air Strut Assembly Repair procedures
Second generation VI (2009–2026) / Hyundai Equus VI 2009-2026 Service Manual / Suspension System / Air Suspension System / Front Air Strut Assembly Repair procedures
| Removal |
Air Strut Assembly
|

| 1. |
Removal the front wheel & tire.
|
| 2. |
Disconnect the air hose (A).
|
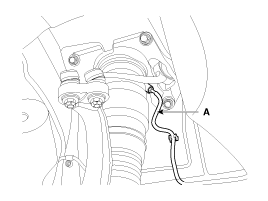
| 3. |
Disconnect the connector.
|
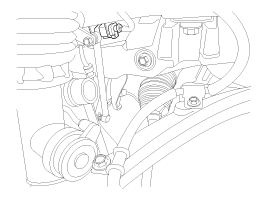
| 4. |
Disconnect the stabilizer link (A) from the front strut assembly by loosening the nuts.
|
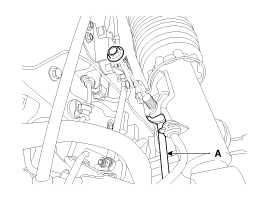
| 5. |
Disconnect the front strut assembly from the front lower arm (A) by loosening the bolt & nut.
|
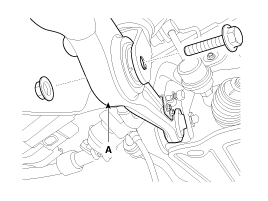
| 6. |
Remove the split pin and castle nuts.
|
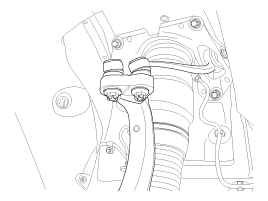
| 7. |
Disconnect the front upper arm (A) from the knuckle using a SST (09568-2J100).
|
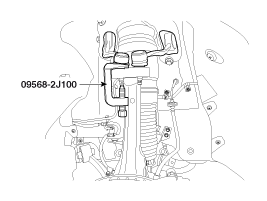
| 8. |
Disconnect the front strut assembly (A) from the frame by loosening the mounting bolt.
|
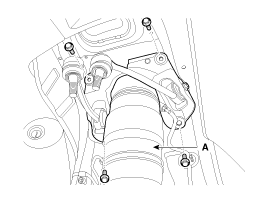
| 9. |
Disconnect the bracket (B) from the front strut assembly (A) loosening the nuts.
|
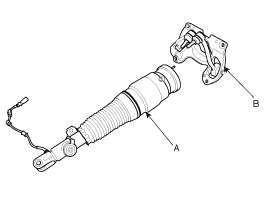
| 10. |
Installation is the reverse of removal.
|
Front Strut Assembly
| 1. |
Remove the front wheel & tire.
|
| 2. |
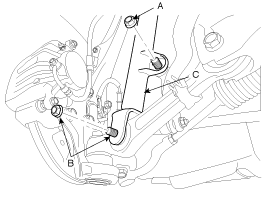
Disconnect the stabilizer link with the front strut assembly by loosening the nuts (A).
|
| 3. |
Disconnect the front strut assembly (C) with the front lower arm by loosening the bolt & nuts (B).
|
| 4. |
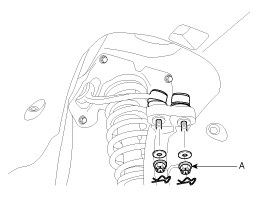
Remove the split pin and castle nuts (A).
|
| 5. |
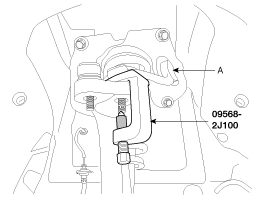
Disconnect the front upper arm (A) with the knuckle using a SST (09568-2J100).
|
| 6. |
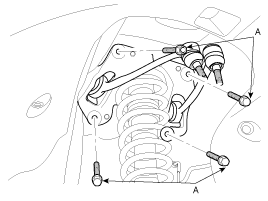
Disconnect the front strut assembly with the frame by loosening the mounting bolt (A).
|
| 7. |
Disconnect the bracket (B) with the front strut assembly (A) loosening the nuts.
|
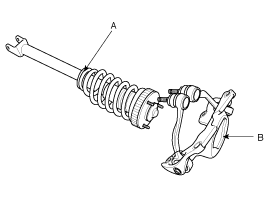
| 8. |
Installation is the reverse of removal. |
| Disassembly |
| 1. |
Compress the coil spring with a strut spring compressor. Do not compress the spring more than necessary. |
| 2. |
Disconnect the cover (A) remove the lock nut (B).
|
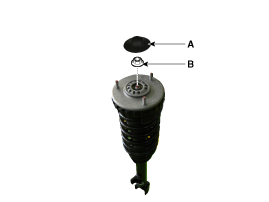
| 3. |
Gradually turn the bolt on the spring compressor to slowly
release the tension from the spring. Then, disconnect the components. |
| 4. |
Reassembly is the reverse of the disassembly.
|
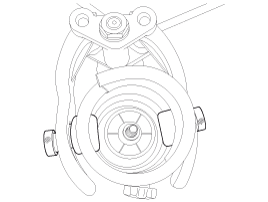
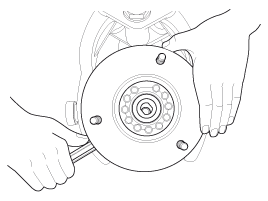
| Inspection |
| 1. |
Check the components for damage or deformation. |
| 2. |
Compress and extend the piston rod and check that there is no abnormal resistance or unusual sound during operation. |
| 3. |
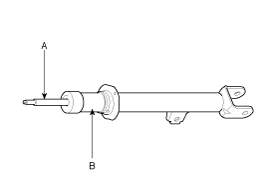
When disposing the shock absorber, fully extend the piston
rod (A) and then drill a hole on the B section to discharge gas from the
cylinder.
|

 Front Air Strut Assembly Troubleshooting
Variable damper (CDC) failure criterion
ConditionsPhenomenaMaintenance considerationsMechanical conditionsLeaking oilAn oil leak indicates that the part has failed and must be replaced.Inner seam ...
 Rear Variable Damper Components and Components Location
Components
1. Sub frame2. Rear shock absorber3. Air spring4. Rear upper arm5. Assist arm6. Trailing arm
...
See also:
3 Zone control button
1. Press the 3 zone button to operate the front passenger's temperature, rear
side temperature, and rear side mode individually. The indicator on the 3 zone button
will be illuminated. Press ...
Keep your car clean
The best way to prevent corrosion is to keep your car clean and free of corrosive
materials. Attention to the underside of the car is particularly important.
If you live in a high-corrosion area ...
Do not let your parking brake freeze
Under some conditions your parking brake can freeze in the engaged position.
This is most likely to happen when there is an accumulation of snow or ice around
or near the rear brakes or if the bra ...
Categories
Hyundai Equus Manuals

© 2011-2026 Copyright www.heqmanual.com