 Hyundai Equus: Rear seat adjustment
Second generation VI (2009–2026) / Hyundai Equus 2009-2026 Owners Manual / Safety features of your vehicle / Seats / Rear seat adjustment
Hyundai Equus: Rear seat adjustment
Second generation VI (2009–2026) / Hyundai Equus 2009-2026 Owners Manual / Safety features of your vehicle / Seats / Rear seat adjustment
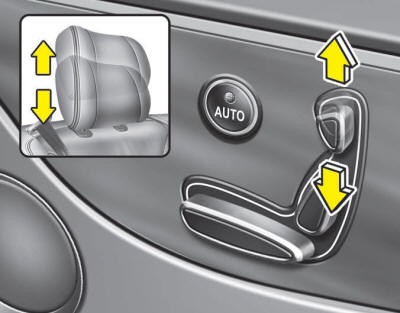
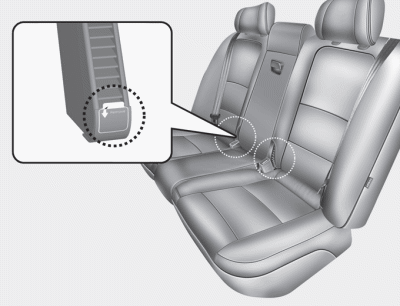
The rear seat can be adjusted by using the control switches located on the door.
WARNING
The power seat is operable with the Engine Start/Stop Button in OFF. Therefore, children should never be left unattended in the vehicle.
CAUTION
-
The power seat is driven by electric motors. Stop operating once the adjustment is completed. Excessive operation may damage the electrical equipment.
-
When in operation, the power seat consumes a large amount of electrical power. To prevent unnecessary battery drain, don’t adjust the power seat longer than necessary while the engine is not running.
-
Do not operate two or more power seat control switches at the same time. Doing so may result in power seat motor or electrical component malfunction.
WARNING
Use extreme caution so that hands or other objects are not caught in the seat mechanisms while the seat is moving. Do not adjust the seat while wearing seat belts. Moving the seat cushion forward may cause strong pressure on the abdomen.
WARNING
Do not operate the rear power seat while the child seat is installed.
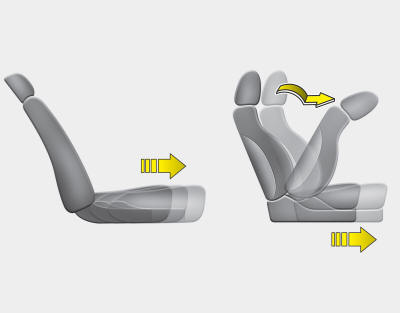
Forward, backward and seatback angle
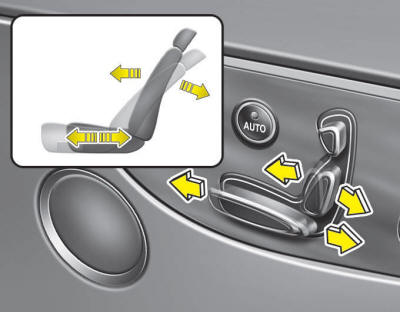
Push the control switch forward or backward to move the seat to the desired position. Release the switch once the seat reaches the desired position.
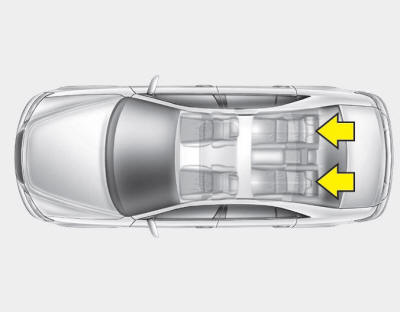
Easy access switch

Your vehicle features an easy access system to provide convenient access for rear passengers. When opening the rear door, the rear seats will move rearward automatically to provide easier access for passengers.
This easy access system will operate only when the control switch is in "ON" position.
Additional switches for adjusting the front passenger seat (if equipped)
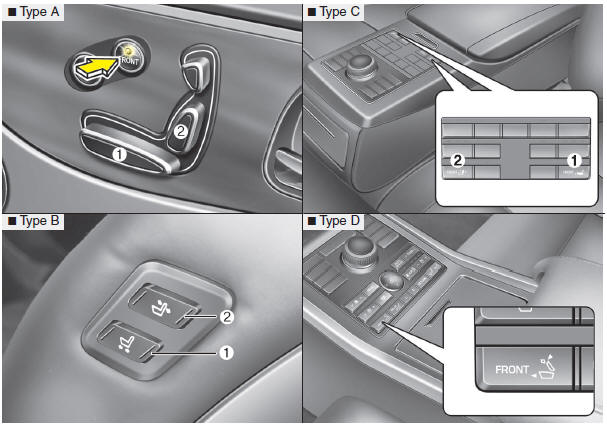
Type A
After pressing the FRONT switch, you can adjust the front passenger seat forward and backward (1), and adjust the seat back angle (2).
Type B, C
Additional switches are provided to move the front passenger seat forward and backward (1), and adjust the seatback angle (2) from the rear seats.
Type D
While pressing the button, the front passenger seat moves forward and backward, and adjusts the seatback angle.
Lumbar support (for rear right and left passenger’s seat) (if equipped)
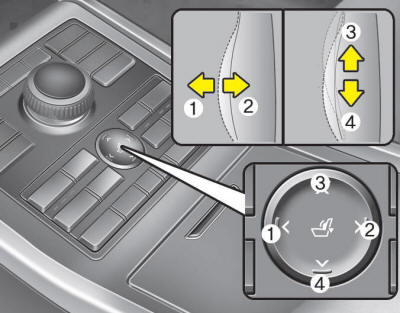
-
• For right side :
Press the R switch.
The lumbar support can be adjusted by pressing the lumbar support switch. Press the front portion of the switch (1) to increase support or the rear portion of the switch (2) to decrease support.
To move the support position up or down, press the switch (3) or (4).
-
• For left side :
Press the L switch.
The lumbar support can be adjusted by pressing the lumbar support switch. Press the front portion of the switch (1) to increase support or the rear portion of the switch (2) to decrease support.
To move the support position up or down, press the switch (3) or (4).
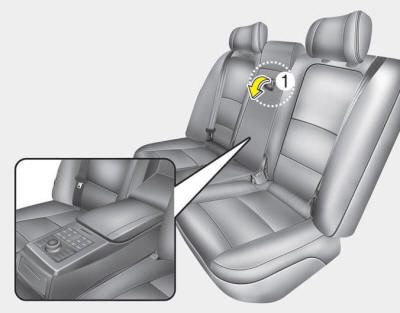
Rear switches operating limitation (if equipped)
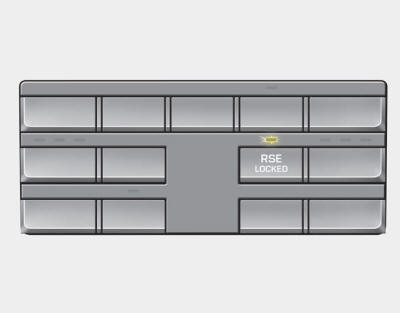
When the RSE LOCKED button is illuminated, the switch lock function of the rear seat operates.
VIP Convenience function (3 seat configuration)
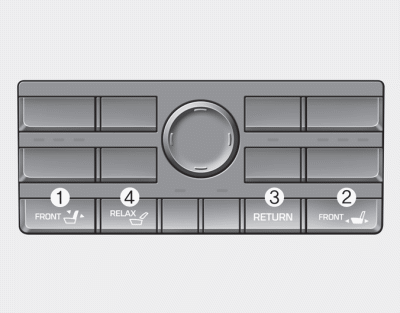
The rear seat passenger may use the switches to control the rear right seat or front passenger seat.

Front passenger side walk-in seat
Press the switch (1):
The seatback will adjust.
Press the switch (2):
The seat will move forward and backward.
Rear relaxation seat system
Press the switch (3):
The front passenger seat and the rear right side passenger seat will move to its original position. After the operation is completed, a beep will sound.
Press the switch (4):
The front passenger seat will move forward and the seatback will fold automatically. Then the rear right side passenger seat seatback will lean towards the back of the vehicle. After the operation is completed, a beep will sound once.
Return function
While the seat is moving by relax mode operation, if the switch (3) is pressed shortly, the rear seat moves to the rearmost position.
However, if the switch (3) is pressed more than 1 second, the rear seat moves to the rearmost position and the leg support moves down. The front passenger seat will automatically move to its original position. When the operation is completed, a beep will sound once.
Leg support
-
• Press the switch (4):
The leg support will move down.
-
• Press the switch (5):
The leg support will move up.
Headrest
The rear seat is equipped with headrests in all the seating positions for the occupant's safety and comfort.
The headrest not only provides comfort for passengers, but also helps to protect the head and neck in the event of a collision.
WARNING
-
For maximum effectiveness in case of an accident, the headrest should be adjusted so the middle of the headrest is at the same height as the center of gravity of an occupant's head. Generally, the center of gravity of most people's head is similar with the height of the top of their eyes. Also, adjust the headrest as close to your head as possible. The use of a cushion that holds the body away from the seatback is not recommended.
-
Do not operate the vehicle with the headrests removed as severe injury to an occupant may occur in the event of an accident. Headrests may provide protection against severe neck injuries when properly adjusted.
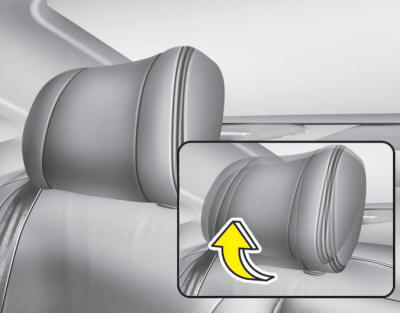
Adjusting the headrest up and down
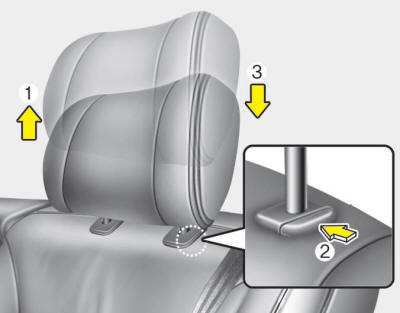
To raise the headrest, pull it up to the desired position (1). To lower the headrest, push and hold the release button (2) on the headrest support and lower the headrest to the desired position (3).
Adjusting the headrest up and down (electric) (if equipped)
Push the control switch up to raise or down to lower the headrest. Release the switch once the headrest reaches the desired position.
Forward and backward adjustment
The headrest may be adjusted forward or backward by pulling the lower part of the headrest forward or backward to the desired detent in the direction of the arrow. Adjust the headrest so that it properly supports the head and neck.
Wing-out
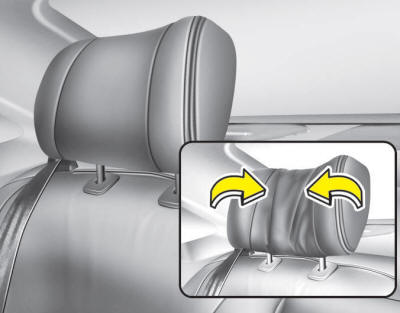
For rear outboard passenger's comfort, the ends of the headrest can be adjusted inward.
Armrest (if equipped)
To use the armrest, pull the knob (1) (if equipped) forward from the seatback.
Cup holder (if equipped)
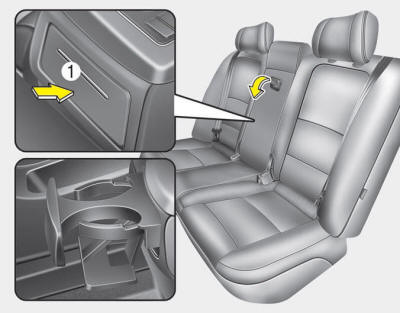
To use the cup holder push button (1).
Storage compartment (if equipped)
To use the storage compartment, push button (2). Close the cover after use.
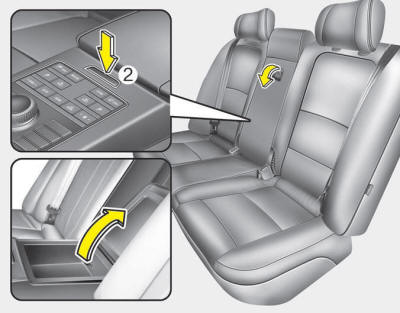
Rear tower console storage (if equipped)
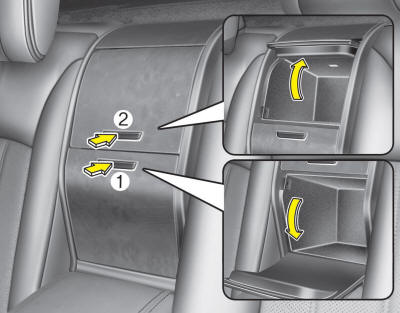
These compartments can be used to store small items.
To open the upper console storage, press button (2) and to open the lower console storage, press button (1). Close the tower console storage after use.
WARNING
-
To reduce the risk of injury in an accident or sudden stop, always keep the tower console storage closed while driving.
-
Close the lower and upper lids while the vehicle is moving. Failure to observe this instruction could cause death or serious injury.
Climate control system seat (if equipped)
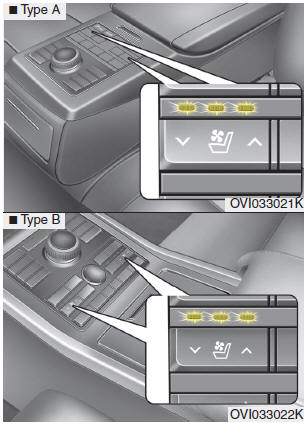
This feature cools or warms the rear seats by blowing air through small vent hole on the surface of the seats and seatbacks.
While the engine is running, push the rear portion of the switch to cool or warm the rear seats.
When the operation of the the climate control system seat is not needed, keep the switches in the OFF position.
-
• Each time you push the button, the airflow changes as follows:

-
• When pressing the switch for more than 1.5 seconds with the climate control system seat operating, the seat cooler will turn OFF.
-
• The climate control system seat defaults to the OFF position whenever the Engine Start/Stop Button is turned on.
-
• With the climate control system seat ON to cool or warm the rear seats, the system turns off or on automatically depending on the seat temperature.
CAUTION
-
The climate control system seat is a supplementary cooling and warming system. Use the climate control seat when the climate control system is on. Using the climate control seat for prolonged periods of time with the climate control system off could cause the climate control seat performance to be reduced.
-
When cleaning the seats, do not use an organic solvent such as thinner, benzene, alcohol and gasoline. Doing so may damage the surface of the seats.
-
Do not spill liquid such as water or beverages on the surface of the front seats and seatbacks, or the air vent holes may be blocked and prevented from working properly.
-
Do not place materials such as plastic bags or newspapers under the seats. The air vent may not work properly as the air intake can be blocked.
-
When the air vent does not operate, restart the vehicle. If there is no change, we recommend that the system be inspected by an authorized EQUUS dealer.
-
Before using the climate control system seat, remove the sticker attached to the rear air vent. If not, the cooling and warming performance may decrease.
 Front seat adjustment
The front seat can be adjusted by using the control switches located on the doors.
Before driving, adjust the seat to the proper position so as to easily control the
steering wheel, pedals and swi ...
 Seat belts
...
See also:
Repair procedures
On-vehicle Inpection
•
First of all, check for DTCs. If a DTC is present, perform
troubleshooting in accordance with the procedure for that DTC. (Refer to
DTC guide)
...
Air Spring Components and Components Location
Components
1. Urethane pad2. Connected to air tube3. Protector4. Air spring
...
Positive Crankcase Ventilation (PCV) Valve Description and Operation
Operation Principle
...
Categories
Hyundai Equus Manuals
