 Hyundai Equus: Exhaust Manifold Repair procedures
Second generation VI (2009–2026) / Hyundai Equus VI 2009-2026 Service Manual / Engine Mechanical System / Intake And Exhaust System / Exhaust Manifold Repair procedures
Hyundai Equus: Exhaust Manifold Repair procedures
Second generation VI (2009–2026) / Hyundai Equus VI 2009-2026 Service Manual / Engine Mechanical System / Intake And Exhaust System / Exhaust Manifold Repair procedures
Second generation VI (2009–2026) / Hyundai Equus VI 2009-2026 Service Manual / Engine Mechanical System / Intake And Exhaust System / Exhaust Manifold Repair procedures
| Removal and Installation |
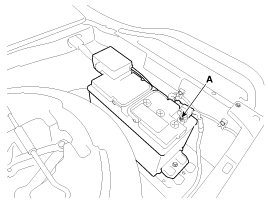
| 1. |
Disconnect the negative terminal (A) from the battery.
|
| 2. |
Remove the engine room cover (A), engine cover (B) and radiator grill upper cover (C).
|
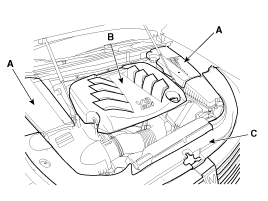
| 3. |
Remove the air cleaner assembly.
|
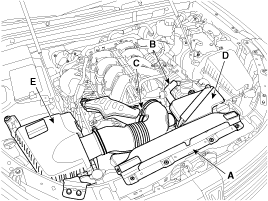
| 4. |
Remove the oil level gauge (A).
|
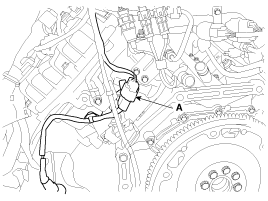
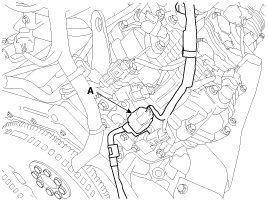
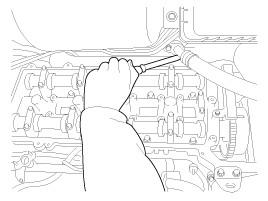
| 5. |
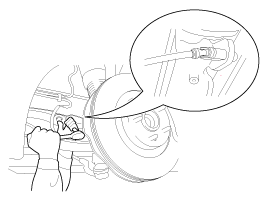
Disconnect the LH/RH oxygen sensor (HO2S) connectors (A) and remove the connector from the bracket.
|
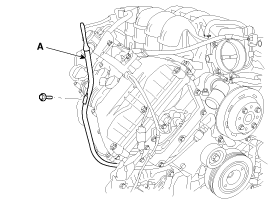
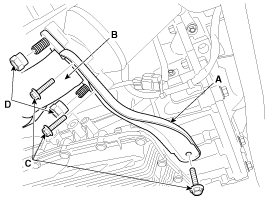
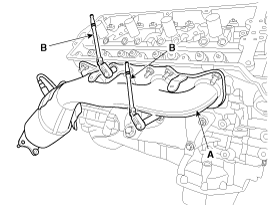
| 6. |
Remove the exhaust manifold stay (A) and then disconnect the front muffler (B) on LH and RH side.
|
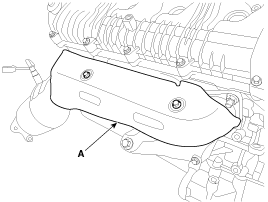
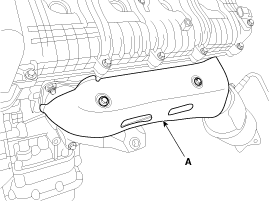
| 7. |
Remove the LH/RH exhaust manifold heat protectors (A).
[RH]
[LH]
|

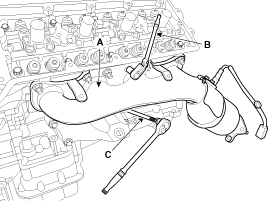
| 8. |
Remove the LH/RH exhaust manifolds (A).
[RH]
[LH]
|
| 9. |
Remove the LH/RH exhaust manifold gaskets.
|
| 10. |
Installation is reverse order of removal.
[LH]
[RH]
|
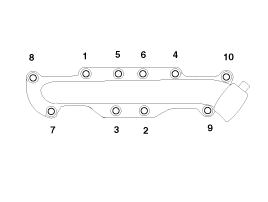
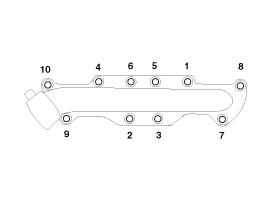
 Exhaust Manifold Components and Components Location
Components
1. Exhaust manifold heat protector2. Exhaust manifold3. Exhaust manifold gasket4. Exhaust manifold stay
...
 Muffler Components and Components Location
Components
1. Front muffler (LH/RH)2. Catalytic converter3. Center muffler4. Main muffler (LH/RH)
...
See also:
Electronic stability control (ESC)
The Electronic Stability control (ESC) system is designed to stabilize the vehicle
during cornering maneuvers. ESC checks where you are steering and where the vehicle
is actually going. ESC ap ...
Reservoir Tank Components and Components Location
Components Location
1. Mounting Bracket2. Pneumatic connection port3. Reservoir tank4. Check Valves
...
PGS Unit (Back & Blinde Unit) Components and Components Location
Components
...
Categories
Hyundai Equus Manuals

© 2011-2026 Copyright www.heqmanual.com