
 Hyundai Equus: Intake Manifold Repair procedures
Second generation VI (2009–2026) / Hyundai Equus VI 2009-2026 Service Manual / Engine Mechanical System / Intake And Exhaust System / Intake Manifold Repair procedures
Hyundai Equus: Intake Manifold Repair procedures
Second generation VI (2009–2026) / Hyundai Equus VI 2009-2026 Service Manual / Engine Mechanical System / Intake And Exhaust System / Intake Manifold Repair procedures
Second generation VI (2009–2026) / Hyundai Equus VI 2009-2026 Service Manual / Engine Mechanical System / Intake And Exhaust System / Intake Manifold Repair procedures
| Removal and Installation |
| 1. |
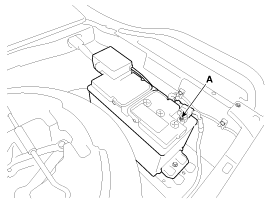
Disconnect the negative terminal (A) from the battery.
|
| 2. |
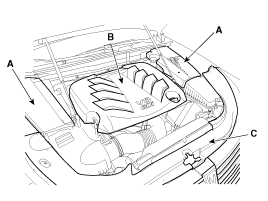
Remove the engine room cover (A), engine cover (B) and radiator grill upper cover (C).
|
| 3. |
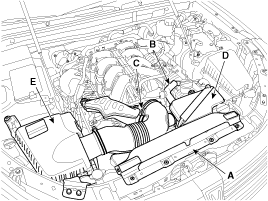
Remove the air cleaner assembly.
|
| 4. |
Remove the fuel hose (A), the purge control solenoid valve (PCSV) hose (B) and the brake booster vacuum hose (C).
|
| 5. |
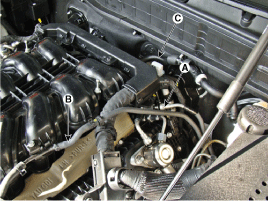
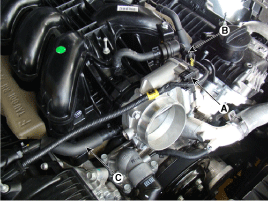
Disconnect the ETC module connector (A), PCSV connector (B) and the PCV hose (C).
|
| 6. |
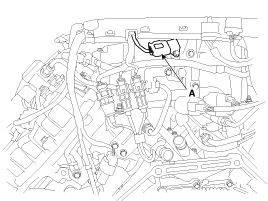
Disconnect the MAP sensor connect (A) located at the rear side of intake module.
|
| 7. |
Remove the wiring harness protector bolts, mounted on the intake module and the cylinder head cover.
|
| 8. |
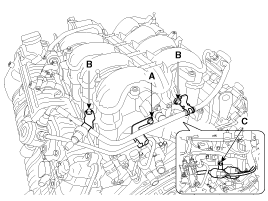
Remove the high pressure fuel pipe bracket bolt (A), low
pressure fuel tube bracket bolts (B) and the injector connector bracket
bolt (C).
|
| 9. |
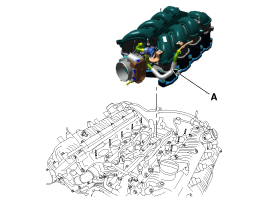
Remove the intake manifold module (A).
|
| 10. |
Installation is reverse order of removal and tighten the manifold nuts with specified torque in the sequence shown.
|
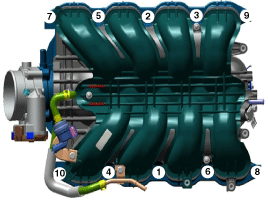
 Intake Manifold Components and Components Location
Components
1. Purge control solenoid valve (PCSV) and hose2. PCV hose3. ETC module4. Intake manifold module5. MAP sensor
...
 Exhaust Manifold Components and Components Location
Components
1. Exhaust manifold heat protector2. Exhaust manifold3. Exhaust manifold gasket4. Exhaust manifold stay
...
See also:
Multi-view Camera Unit Components and Components Location
Components
...
Oil Pump Components and Components Location
Components Location
1. Oil seal2. Reaction shaft3. Housing4. Cover5. O-Ring6. Reaction shaft7. Snap ring8. Needle bearing9. 8LR/B return spring10. 8LR/B piston
...
Battery saver function
The purpose of this feature is to prevent the battery from being discharged.
The system automatically turns off the parking lights when the driver turns
off the engine and opens the driver-si ...
Categories
Hyundai Equus Manuals

© 2011-2026 Copyright www.heqmanual.com