 Hyundai Equus: Rain Sensor Repair procedures
Second generation VI (2009–2025) / Hyundai Equus VI 2009-2025 Service Manual / Body Electrical System / Windshield Wiper/Washer / Rain Sensor Repair procedures
Second generation VI (2009–2025) / Hyundai Equus VI 2009-2025 Service Manual / Body Electrical System / Windshield Wiper/Washer / Rain Sensor Repair procedures
| Removal |
The dust or foreign substance on the rain sensor have a bad
effect upon the rain sensor capability,so protect the sensor surface
with protection cover until installing the rain sensor to bracket for
accurate funtion.
The coupling pad on the rain sensor surface has adherive
strength, so the coupling pad could stick to the windshield by
environment condition during the using time.
If separate it by force, it could be damaged. So make sure to separate the rain sensor from the windshield carefully. |
| 1. |
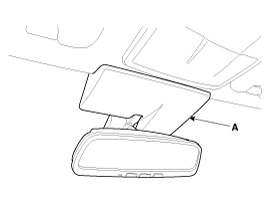
Remove the rain sensor and LDWS unit cover (A) first.
|
| 2. |
Remove the wiring harness connector from sensor.
|
| 3. |
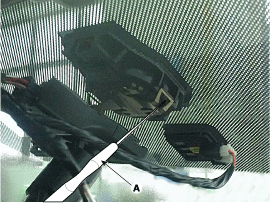
Be careful not to damage the cover latch by applying
excessive force. To remove the rainsensor, pull aside the latch bracket
hele with a small flat - blade screwdriver (A). |
| 4. |
Rain sensor module is attached to the front windshield by
glue replacing the front windshield, remove the rain sensor module from
the existing front windshield and install on the new front windshield. |
| Installation |
|
| 1. |
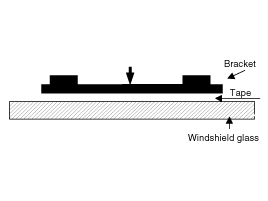
Install the rainsensor bracket to the windshield glass using the tape.
|
| 2. |
Connect the rainsensor connector, and then install the sensor cover. |
 Rain Sensor Description and Operation
Description
Integrated Rain Sensor
Integrated rain sensor (A) controls three systems: front wiper, auto-light, and central air conditioner.
1.
Wiper Control System
When "AUTO" switch signal i ...
See also:
Crash Pad Under Cover Repair procedures
Replacement
[LH]
•
Put on gloves to protect your hands.
•
When prying with a flat-tip screwdriver, wrap it with
protective tape, and ap ...
Headlight escort function
If you turn the Engine Start/Stop Button to the ACC or OFF position with the
headlights ON, the headlights (and/or tail lights) remain on for about 5 minutes.
However, if the driver’s door is op ...
Damper Clutch Control Solenoid Valve Repair procedures
Inspection
1.
Turn ignition switch OFF.
2.
Disconnect the E Module connector.
3.
Measure resistance between sensor signal terminal and sensor ground terminal.
4.
Check that the resi ...
Categories
Hyundai Equus Manuals
© 2011-2025 Copyright www.heqmanual.com


