 Hyundai Equus: Console Armrest Repair procedures
Second generation VI (2009–2026) / Hyundai Equus VI 2009-2026 Service Manual / Body (Interior and Exterior) / Floor Console / Console Armrest Repair procedures
Hyundai Equus: Console Armrest Repair procedures
Second generation VI (2009–2026) / Hyundai Equus VI 2009-2026 Service Manual / Body (Interior and Exterior) / Floor Console / Console Armrest Repair procedures
| Replacement |
|

|

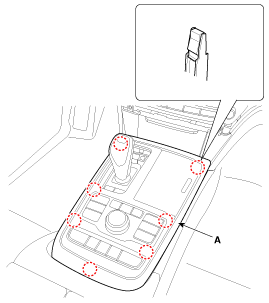
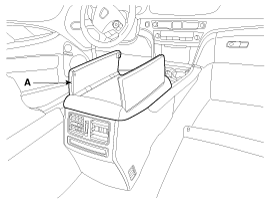
| 1. |
Using a screwdriver or remover, remove the front console upper complete (A).
|
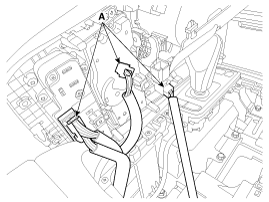
| 2. |
Disconnect the connectors (A).
|
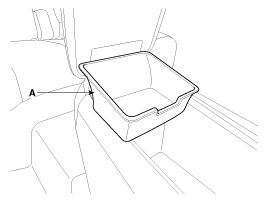
| 3. |
Remove the console armrest tray (A).
|
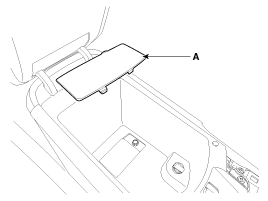
| 4. |
Remove the console armrest service cover (A).
|
| 5. |
Loosen the mounting bolts, remove the console armrest (A).
|
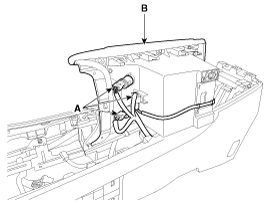
| 6. |
Disconnect the connectors (A). |
| 7. |
Remove the front console armrest (B).
|
| 8. |
Install in the reverse order of removal.
|

|
|
| 1. |
Remove the rear seat cushion assembly.
(Refer to Rear Seat - "Rear Seat Assembly") |
| 2. |
Remove the rear seat back cover assembly.
(Refer to Rear Seat - "Rear Seat Assembly") |
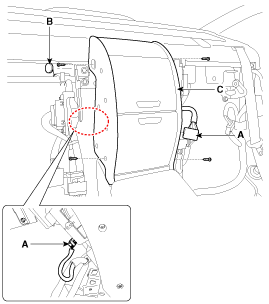
| 3. |
Disconnect the connectors (A). |
| 4. |
Remove the caps (B). |
| 5. |
After loosening the mounting bolts, remove the rear tower console complete assembly (C).
|
| 6. |
Loosen the mounting screws and bolts, remove the rear console armrest (A).
|

| 7. |
Install in the reverse order of removal.
|
 Console Armrest Components and Components Location
Component Location
[Front Console Armrest]
1. Front console armrest
[Rear Console Armrest]
1. Rear console armrest
...
 Crash Pad
...
See also:
Air Lumber Support Switch Repair procedures
Inspection
1.
Disconnect the negative(-) battery terminal.
2.
Remove the shield outer cover.
(Refer to Body - "Front Seat Shield Outer Cover")
3.
Disconnect the power seat air lumber supp ...
Seat Belt Pretensioner (BPT) Description and Operation
Description
The Seat Belt Pretensioners (BPT) are installed inside center
pillar (LH & RH). When a vehicle crashes with a certain degree of
frontal impact, the pretensioner seat belt helps ...
Checking the power steering fluid level
With the vehicle on level ground, check the fluid level in the power steering
reservoir periodically. The fluid should be between MAX and MIN marks on the side
of the gauge at the normal tempe ...
Categories
Hyundai Equus Manuals
