 Hyundai Equus: Floor Console Assembly Repair procedures
Second generation VI (2009–2026) / Hyundai Equus VI 2009-2026 Service Manual / Body (Interior and Exterior) / Floor Console / Floor Console Assembly Repair procedures
Hyundai Equus: Floor Console Assembly Repair procedures
Second generation VI (2009–2026) / Hyundai Equus VI 2009-2026 Service Manual / Body (Interior and Exterior) / Floor Console / Floor Console Assembly Repair procedures
Second generation VI (2009–2026) / Hyundai Equus VI 2009-2026 Service Manual / Body (Interior and Exterior) / Floor Console / Floor Console Assembly Repair procedures
| Replacement |
| [Front Console Assembly] |
|

|

| 1. |
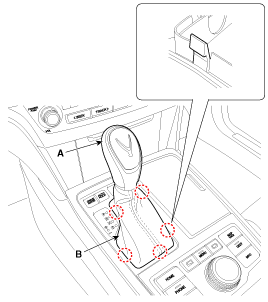
Using a screwdriver or remover, remove the gear boots (B). |
| 2. |
To remove the gear knob (A) and gear boots (B) pull both of it up.
|
| 3. |
Using a screwdriver or remover, remove the front console upper cover (A).
|
| 4. |
Disconnect the connectors (A).
|
| 5. |
Using a screwdriver or remover, remove the console side cover (A).
[LH]
[RH]
|
| 6. |
Disconnect the floor console main connector (A).
|
| 7. |
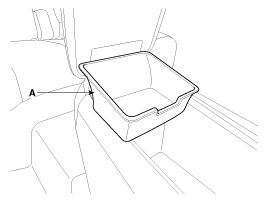
Remove the console armrest tray (A).
|
| 8. |
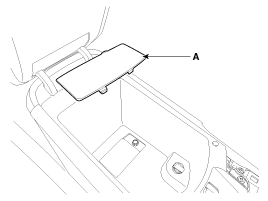
Remove the console armrest service cover (A).
|
| 9. |
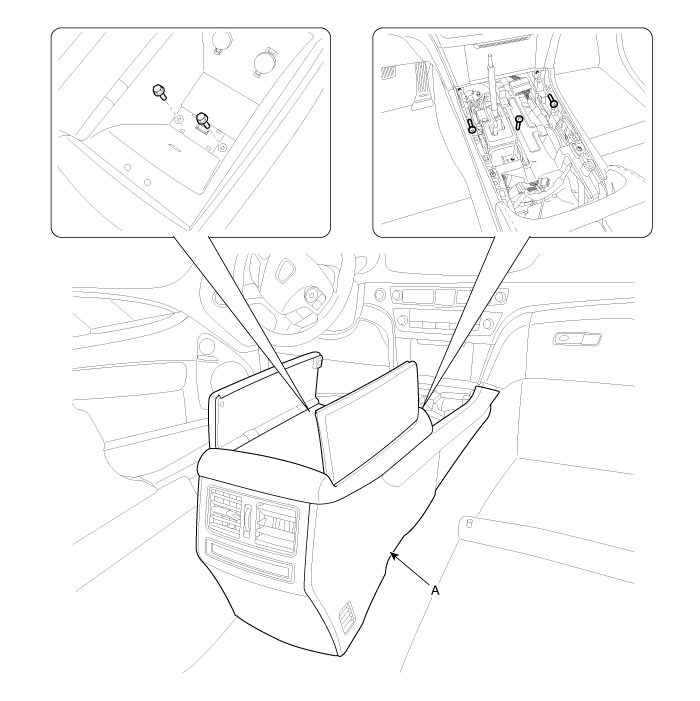
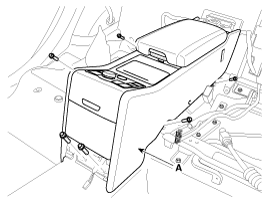
After loosening the mounting screws and bolts, then remove the floor console assembly (A).
|
| 10. |
Install in the reverse order of removal.
|

| [Rear Console Assembly] |
| 1. |
Remove the rear seat assembly.
(Refer to Rear Seat - "Rear Seat Assembly") |
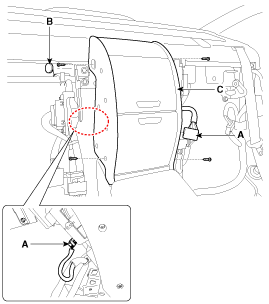
| 2. |
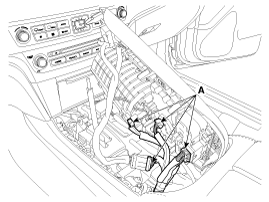
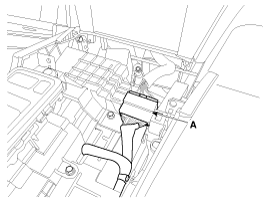
Disconnect the connectors (A). |
| 3. |
Remove the caps (B). |
| 4. |
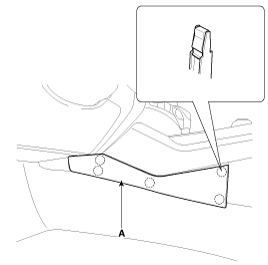
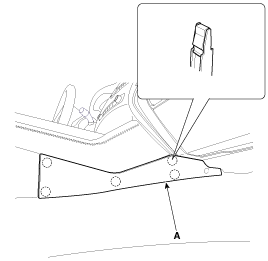
After loosening the mounting bolts, remove the rear tower console complete assembly (C).
|
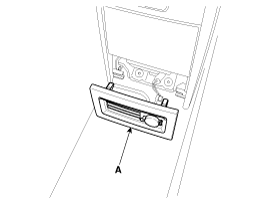
| 5. |
Remove the nozzle assembly (A).
|
| 6. |
Disconnect the connectors (A).
|
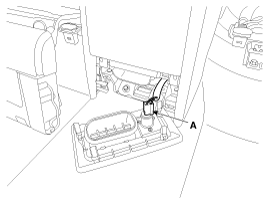
| 7. |
After loosening the mounting bolts, remove the rear floor console complete assembly (A).
|
| 8. |
Install in the reverse order of removal.
|
 Floor Console Assembly Components and Components Location
Component Location
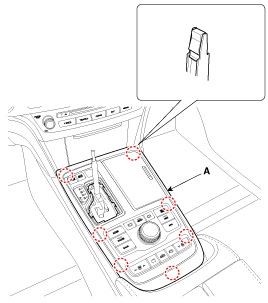
1. Floor console assembly
...
 Rear Console Cover Components and Components Location
Component Location
1. Rear console cover
...
See also:
Telemetics Unit (TMU) Components and Components Location
Component
Connector Pin Information
No.DescriptionNo.Description1Ground17Battery 22Ground18Battery 13-19IGN 14Keypad ground20ACC5MIC output -21Airbag6MIC output +22Keypad input7-23-8RS422 shie ...
Lumbar Support Unit Repair procedures
Removal
1.
Disconnect the negative (-) battery terminal.
2.
Remove the rear seat back.
(Refer to Body - "Rear Seat Back Cover")
3.
Remove the bladder & ECU/ valve assembly (A) after l ...
Inhibitor Switch Specifications
Specifications
x Type: Combination of output signals from 4 terminals
Power supply (V)12Output typeCombination of output signals
Signal Code Table
PIN No.PP-RRR-NNN-DDS112V12VO ...
Categories
Hyundai Equus Manuals

© 2011-2026 Copyright www.heqmanual.com