 Hyundai Equus: Compressor Repair procedures
Second generation VI (2009–2024) / Hyundai Equus VI 2009-2024 Service Manual / Suspension System / Air Suspension System / Compressor Repair procedures
Hyundai Equus: Compressor Repair procedures
Second generation VI (2009–2024) / Hyundai Equus VI 2009-2024 Service Manual / Suspension System / Air Suspension System / Compressor Repair procedures
Second generation VI (2009–2024) / Hyundai Equus VI 2009-2024 Service Manual / Suspension System / Air Suspension System / Compressor Repair procedures
| Removal |
|

| 1. |
Removal the front bumper.
(Refer to Body - "Front bumper") |
| 2. |
Removal the left head amp.
(Refer to Body Electrical System - "Head lamp leveling device") |
| 3. |
Removal the EHPS motor.
(Refer to Steering System - "Power steering motor") |
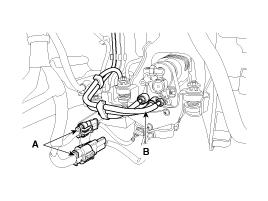
| 4. |
Disconnect the connector (A) & air hose (B).
|

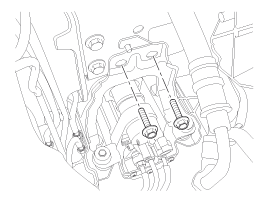
| 5. |
Remove the bracket bolt.
|
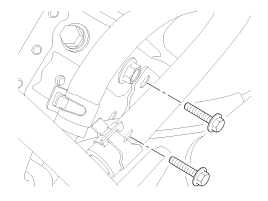
| 6. |
Disconnect the solenoid valve (A) from the compressor by loosening the bolt.
|
| 7. |
Installation is the reverse of removal.
|
 Compressor Schematic Diagrams
Circuit diagram
1.
Air compressor connector
[Motor power connector (A)][Exhaust valve connector (B)][Temperature sensor connector (C)]
2.
Air compressor terminal function
[Motor power]
...
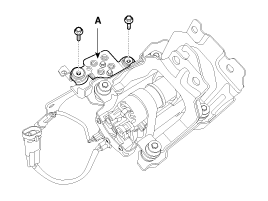
 Solenoid Valve Components and Components Location
Components
1. Connected to air tube2. Bracket3. Connector
...
See also:
Repair procedures
Fuel Pressure Test
1.
Release the residual pressure in fuel line.
(Refer to Fuel Delivery System - "Release Residual Pressure in Fuel Line")
When removing the fuel pump re ...
Components and Components Location
Components
1. BSD (Blind Spot Detection) switch module (ON/OFF switch & state LED)2. Speaker (Built in the cluster)3. Head Up Display (HUD)4. BSD warning lamp (Built in the outside mirror)5. ...
Repair procedures
Adjustment
1.
After loosening the hinge (A) mounting bolt, adjust the hood (B) by moving it up or down, or right or left.
2.
Adjust the hood height by turning the hood overslam bumpers (C).
...
Categories
Hyundai Equus Manuals

© 2011-2024 Copyright www.heqmanual.com